Theoretical & Practical Chess Endgame Mastery Hub
Master 110 essential pawn, rook, minor-piece, and queen endgames across 10 conversion and defensive protocols.
- King + Pawn vs King (Key Squares on 6th Rank) — Win/Draw Landmarks
- King + Pawn vs King (Key Squares on 6th Rank) — Conversion Technique
- King + Pawn vs King (Key Squares on 6th Rank) — Defensive Hold
- King + Pawn vs King (Key Squares on 6th Rank) — Common Blunders
- King + Pawn vs King (Key Squares on 6th Rank) — King Activation
- King + Pawn vs King (Key Squares on 6th Rank) — Tempo Counting
- King + Pawn vs King (Key Squares on 6th Rank) — Increment Execution
- King + Pawn vs King (Key Squares on 6th Rank) — Both-Sides AI Drill
- King + Pawn vs King (Key Squares on 6th Rank) — When to Trade
- King + Pawn vs King (Key Squares on 6th Rank) — Schematic Plan
- Direct Opposition (Even vs Odd File Distance) — Win/Draw Landmarks
- Direct Opposition (Even vs Odd File Distance) — Conversion Technique
- Direct Opposition (Even vs Odd File Distance) — Defensive Hold
- Direct Opposition (Even vs Odd File Distance) — Common Blunders
- Direct Opposition (Even vs Odd File Distance) — King Activation
- Direct Opposition (Even vs Odd File Distance) — Tempo Counting
- Direct Opposition (Even vs Odd File Distance) — Increment Execution
- Direct Opposition (Even vs Odd File Distance) — Both-Sides AI Drill
- Direct Opposition (Even vs Odd File Distance) — When to Trade
- Direct Opposition (Even vs Odd File Distance) — Schematic Plan
- Distant Opposition on Open Files — Win/Draw Landmarks
- Distant Opposition on Open Files — Conversion Technique
- Distant Opposition on Open Files — Defensive Hold
- Distant Opposition on Open Files — Common Blunders
- Distant Opposition on Open Files — King Activation
- Distant Opposition on Open Files — Tempo Counting
- Distant Opposition on Open Files — Increment Execution
- Distant Opposition on Open Files — Both-Sides AI Drill
- Distant Opposition on Open Files — When to Trade
- Distant Opposition on Open Files — Schematic Plan
- Diagonal Opposition Stepping Stone — Win/Draw Landmarks
- Diagonal Opposition Stepping Stone — Conversion Technique
- Diagonal Opposition Stepping Stone — Defensive Hold
- Diagonal Opposition Stepping Stone — Common Blunders
- Diagonal Opposition Stepping Stone — King Activation
- Diagonal Opposition Stepping Stone — Tempo Counting
- Diagonal Opposition Stepping Stone — Increment Execution
- Diagonal Opposition Stepping Stone — Both-Sides AI Drill
- Diagonal Opposition Stepping Stone — When to Trade
- Diagonal Opposition Stepping Stone — Schematic Plan
- Triangulation to Lose a Tempo — Win/Draw Landmarks
- Triangulation to Lose a Tempo — Conversion Technique
- Triangulation to Lose a Tempo — Defensive Hold
- Triangulation to Lose a Tempo — Common Blunders
- Triangulation to Lose a Tempo — King Activation
- Triangulation to Lose a Tempo — Tempo Counting
- Triangulation to Lose a Tempo — Increment Execution
- Triangulation to Lose a Tempo — Both-Sides AI Drill
- Triangulation to Lose a Tempo — When to Trade
- Triangulation to Lose a Tempo — Schematic Plan
- Outflanking the Enemy King — Win/Draw Landmarks
- Outflanking the Enemy King — Conversion Technique
- Outflanking the Enemy King — Defensive Hold
- Outflanking the Enemy King — Common Blunders
- Outflanking the Enemy King — King Activation
- Outflanking the Enemy King — Tempo Counting
- Outflanking the Enemy King — Increment Execution
- Outflanking the Enemy King — Both-Sides AI Drill
- Outflanking the Enemy King — When to Trade
- Outflanking the Enemy King — Schematic Plan
- Rule of the Square for Pawn Races — Win/Draw Landmarks
- Rule of the Square for Pawn Races — Conversion Technique
- Rule of the Square for Pawn Races — Defensive Hold
- Rule of the Square for Pawn Races — Common Blunders
- Rule of the Square for Pawn Races — King Activation
- Rule of the Square for Pawn Races — Tempo Counting
- Rule of the Square for Pawn Races — Increment Execution
- Rule of the Square for Pawn Races — Both-Sides AI Drill
- Rule of the Square for Pawn Races — When to Trade
- Rule of the Square for Pawn Races — Schematic Plan
- Pawn Breakthrough (3 vs 3 Symmetric Pawns) — Win/Draw Landmarks
- Pawn Breakthrough (3 vs 3 Symmetric Pawns) — Conversion Technique
- Pawn Breakthrough (3 vs 3 Symmetric Pawns) — Defensive Hold
- Pawn Breakthrough (3 vs 3 Symmetric Pawns) — Common Blunders
- Pawn Breakthrough (3 vs 3 Symmetric Pawns) — King Activation
- Pawn Breakthrough (3 vs 3 Symmetric Pawns) — Tempo Counting
- Pawn Breakthrough (3 vs 3 Symmetric Pawns) — Increment Execution
- Pawn Breakthrough (3 vs 3 Symmetric Pawns) — Both-Sides AI Drill
- Pawn Breakthrough (3 vs 3 Symmetric Pawns) — When to Trade
- Pawn Breakthrough (3 vs 3 Symmetric Pawns) — Schematic Plan
- Rook Pawn (a/h-Pawn) Stalemate Corners — Win/Draw Landmarks
- Rook Pawn (a/h-Pawn) Stalemate Corners — Conversion Technique
- Rook Pawn (a/h-Pawn) Stalemate Corners — Defensive Hold
- Rook Pawn (a/h-Pawn) Stalemate Corners — Common Blunders
- Rook Pawn (a/h-Pawn) Stalemate Corners — King Activation
- Rook Pawn (a/h-Pawn) Stalemate Corners — Tempo Counting
- Rook Pawn (a/h-Pawn) Stalemate Corners — Increment Execution
- Rook Pawn (a/h-Pawn) Stalemate Corners — Both-Sides AI Drill
- Rook Pawn (a/h-Pawn) Stalemate Corners — When to Trade
- Rook Pawn (a/h-Pawn) Stalemate Corners — Schematic Plan
- Wrong-Colored Rook Pawn + Bishop Fortress — Win/Draw Landmarks
- Wrong-Colored Rook Pawn + Bishop Fortress — Conversion Technique
- Wrong-Colored Rook Pawn + Bishop Fortress — Defensive Hold
- Wrong-Colored Rook Pawn + Bishop Fortress — Common Blunders
- Wrong-Colored Rook Pawn + Bishop Fortress — King Activation
- Wrong-Colored Rook Pawn + Bishop Fortress — Tempo Counting
- Wrong-Colored Rook Pawn + Bishop Fortress — Increment Execution
- Wrong-Colored Rook Pawn + Bishop Fortress — Both-Sides AI Drill
- Wrong-Colored Rook Pawn + Bishop Fortress — When to Trade
- Wrong-Colored Rook Pawn + Bishop Fortress — Schematic Plan
- Queen + King Basic Checkmate Box — Win/Draw Landmarks
- Queen + King Basic Checkmate Box — Conversion Technique
- Queen + King Basic Checkmate Box — Defensive Hold
- Queen + King Basic Checkmate Box — Common Blunders
- Queen + King Basic Checkmate Box — King Activation
- Queen + King Basic Checkmate Box — Tempo Counting
- Queen + King Basic Checkmate Box — Increment Execution
- Queen + King Basic Checkmate Box — Both-Sides AI Drill
- Queen + King Basic Checkmate Box — When to Trade
- Queen + King Basic Checkmate Box — Schematic Plan
- Rook + King Basic Checkmate Cut-Off — Win/Draw Landmarks
- Rook + King Basic Checkmate Cut-Off — Conversion Technique
- Rook + King Basic Checkmate Cut-Off — Defensive Hold
- Rook + King Basic Checkmate Cut-Off — Common Blunders
- Rook + King Basic Checkmate Cut-Off — King Activation
- Rook + King Basic Checkmate Cut-Off — Tempo Counting
- Rook + King Basic Checkmate Cut-Off — Increment Execution
- Rook + King Basic Checkmate Cut-Off — Both-Sides AI Drill
- Rook + King Basic Checkmate Cut-Off — When to Trade
- Rook + King Basic Checkmate Cut-Off — Schematic Plan
- Two Bishops Checkmate Technique — Win/Draw Landmarks
- Two Bishops Checkmate Technique — Conversion Technique
- Two Bishops Checkmate Technique — Defensive Hold
- Two Bishops Checkmate Technique — Common Blunders
- Two Bishops Checkmate Technique — King Activation
- Two Bishops Checkmate Technique — Tempo Counting
- Two Bishops Checkmate Technique — Increment Execution
- Two Bishops Checkmate Technique — Both-Sides AI Drill
- Two Bishops Checkmate Technique — When to Trade
- Two Bishops Checkmate Technique — Schematic Plan
- Bishop + Knight Checkmate (W-Maneuver / Delétang Triangles) — Win/Draw Landmarks
- Bishop + Knight Checkmate (W-Maneuver / Delétang Triangles) — Conversion Technique
- Bishop + Knight Checkmate (W-Maneuver / Delétang Triangles) — Defensive Hold
- Bishop + Knight Checkmate (W-Maneuver / Delétang Triangles) — Common Blunders
- Bishop + Knight Checkmate (W-Maneuver / Delétang Triangles) — King Activation
- Bishop + Knight Checkmate (W-Maneuver / Delétang Triangles) — Tempo Counting
- Bishop + Knight Checkmate (W-Maneuver / Delétang Triangles) — Increment Execution
- Bishop + Knight Checkmate (W-Maneuver / Delétang Triangles) — Both-Sides AI Drill
- Bishop + Knight Checkmate (W-Maneuver / Delétang Triangles) — When to Trade
- Bishop + Knight Checkmate (W-Maneuver / Delétang Triangles) — Schematic Plan
- Queen vs Pawn on 7th Rank (Center/Bishop Pawn) — Win/Draw Landmarks
- Queen vs Pawn on 7th Rank (Center/Bishop Pawn) — Conversion Technique
- Queen vs Pawn on 7th Rank (Center/Bishop Pawn) — Defensive Hold
- Queen vs Pawn on 7th Rank (Center/Bishop Pawn) — Common Blunders
- Queen vs Pawn on 7th Rank (Center/Bishop Pawn) — King Activation
- Queen vs Pawn on 7th Rank (Center/Bishop Pawn) — Tempo Counting
- Queen vs Pawn on 7th Rank (Center/Bishop Pawn) — Increment Execution
- Queen vs Pawn on 7th Rank (Center/Bishop Pawn) — Both-Sides AI Drill
- Queen vs Pawn on 7th Rank (Center/Bishop Pawn) — When to Trade
- Queen vs Pawn on 7th Rank (Center/Bishop Pawn) — Schematic Plan
- Queen vs Rook Pawn on 7th Rank Drawing Zone — Win/Draw Landmarks
- Queen vs Rook Pawn on 7th Rank Drawing Zone — Conversion Technique
- Queen vs Rook Pawn on 7th Rank Drawing Zone — Defensive Hold
- Queen vs Rook Pawn on 7th Rank Drawing Zone — Common Blunders
- Queen vs Rook Pawn on 7th Rank Drawing Zone — King Activation
- Queen vs Rook Pawn on 7th Rank Drawing Zone — Tempo Counting
- Queen vs Rook Pawn on 7th Rank Drawing Zone — Increment Execution
- Queen vs Rook Pawn on 7th Rank Drawing Zone — Both-Sides AI Drill
- Queen vs Rook Pawn on 7th Rank Drawing Zone — When to Trade
- Queen vs Rook Pawn on 7th Rank Drawing Zone — Schematic Plan
- Queen vs Knight Pawn on 7th Rank Winning Zones — Win/Draw Landmarks
- Queen vs Knight Pawn on 7th Rank Winning Zones — Conversion Technique
- Queen vs Knight Pawn on 7th Rank Winning Zones — Defensive Hold
- Queen vs Knight Pawn on 7th Rank Winning Zones — Common Blunders
- Queen vs Knight Pawn on 7th Rank Winning Zones — King Activation
- Queen vs Knight Pawn on 7th Rank Winning Zones — Tempo Counting
- Queen vs Knight Pawn on 7th Rank Winning Zones — Increment Execution
- Queen vs Knight Pawn on 7th Rank Winning Zones — Both-Sides AI Drill
- Queen vs Knight Pawn on 7th Rank Winning Zones — When to Trade
- Queen vs Knight Pawn on 7th Rank Winning Zones — Schematic Plan
- Lucena Position (Building the Bridge) — Win/Draw Landmarks
- Lucena Position (Building the Bridge) — Conversion Technique
- Lucena Position (Building the Bridge) — Defensive Hold
- Lucena Position (Building the Bridge) — Common Blunders
- Lucena Position (Building the Bridge) — King Activation
- Lucena Position (Building the Bridge) — Tempo Counting
- Lucena Position (Building the Bridge) — Increment Execution
- Lucena Position (Building the Bridge) — Both-Sides AI Drill
- Lucena Position (Building the Bridge) — When to Trade
- Lucena Position (Building the Bridge) — Schematic Plan
- Philidor Position (3rd Rank Passive + 6th Rank Checks) — Win/Draw Landmarks
- Philidor Position (3rd Rank Passive + 6th Rank Checks) — Conversion Technique
- Philidor Position (3rd Rank Passive + 6th Rank Checks) — Defensive Hold
- Philidor Position (3rd Rank Passive + 6th Rank Checks) — Common Blunders
- Philidor Position (3rd Rank Passive + 6th Rank Checks) — King Activation
- Philidor Position (3rd Rank Passive + 6th Rank Checks) — Tempo Counting
- Philidor Position (3rd Rank Passive + 6th Rank Checks) — Increment Execution
- Philidor Position (3rd Rank Passive + 6th Rank Checks) — Both-Sides AI Drill
- Philidor Position (3rd Rank Passive + 6th Rank Checks) — When to Trade
- Philidor Position (3rd Rank Passive + 6th Rank Checks) — Schematic Plan
- Short-Side + Long-Side Rook Defense — Win/Draw Landmarks
- Short-Side + Long-Side Rook Defense — Conversion Technique
- Short-Side + Long-Side Rook Defense — Defensive Hold
- Short-Side + Long-Side Rook Defense — Common Blunders
- Short-Side + Long-Side Rook Defense — King Activation
- Short-Side + Long-Side Rook Defense — Tempo Counting
- Short-Side + Long-Side Rook Defense — Increment Execution
- Short-Side + Long-Side Rook Defense — Both-Sides AI Drill
- Short-Side + Long-Side Rook Defense — When to Trade
- Short-Side + Long-Side Rook Defense — Schematic Plan
- Vancura Position (Side Checks Against a-Pawn) — Win/Draw Landmarks
- Vancura Position (Side Checks Against a-Pawn) — Conversion Technique
- Vancura Position (Side Checks Against a-Pawn) — Defensive Hold
- Vancura Position (Side Checks Against a-Pawn) — Common Blunders
- Vancura Position (Side Checks Against a-Pawn) — King Activation
- Vancura Position (Side Checks Against a-Pawn) — Tempo Counting
- Vancura Position (Side Checks Against a-Pawn) — Increment Execution
- Vancura Position (Side Checks Against a-Pawn) — Both-Sides AI Drill
- Vancura Position (Side Checks Against a-Pawn) — When to Trade
- Vancura Position (Side Checks Against a-Pawn) — Schematic Plan
- Kling & Horwitz Defense — Win/Draw Landmarks
- Kling & Horwitz Defense — Conversion Technique
- Kling & Horwitz Defense — Defensive Hold
- Kling & Horwitz Defense — Common Blunders
- Kling & Horwitz Defense — King Activation
- Kling & Horwitz Defense — Tempo Counting
- Kling & Horwitz Defense — Increment Execution
- Kling & Horwitz Defense — Both-Sides AI Drill
- Kling & Horwitz Defense — When to Trade
- Kling & Horwitz Defense — Schematic Plan
- Tarrasch Rule (Rook Behind Passed Pawn) — Win/Draw Landmarks
- Tarrasch Rule (Rook Behind Passed Pawn) — Conversion Technique
- Tarrasch Rule (Rook Behind Passed Pawn) — Defensive Hold
- Tarrasch Rule (Rook Behind Passed Pawn) — Common Blunders
- Tarrasch Rule (Rook Behind Passed Pawn) — King Activation
- Tarrasch Rule (Rook Behind Passed Pawn) — Tempo Counting
- Tarrasch Rule (Rook Behind Passed Pawn) — Increment Execution
- Tarrasch Rule (Rook Behind Passed Pawn) — Both-Sides AI Drill
- Tarrasch Rule (Rook Behind Passed Pawn) — When to Trade
- Tarrasch Rule (Rook Behind Passed Pawn) — Schematic Plan
- Rook + Pawn vs Rook (f-Pawn & h-Pawn Exceptions) — Win/Draw Landmarks
- Rook + Pawn vs Rook (f-Pawn & h-Pawn Exceptions) — Conversion Technique
- Rook + Pawn vs Rook (f-Pawn & h-Pawn Exceptions) — Defensive Hold
- Rook + Pawn vs Rook (f-Pawn & h-Pawn Exceptions) — Common Blunders
- Rook + Pawn vs Rook (f-Pawn & h-Pawn Exceptions) — King Activation
- Rook + Pawn vs Rook (f-Pawn & h-Pawn Exceptions) — Tempo Counting
- Rook + Pawn vs Rook (f-Pawn & h-Pawn Exceptions) — Increment Execution
- Rook + Pawn vs Rook (f-Pawn & h-Pawn Exceptions) — Both-Sides AI Drill
- Rook + Pawn vs Rook (f-Pawn & h-Pawn Exceptions) — When to Trade
- Rook + Pawn vs Rook (f-Pawn & h-Pawn Exceptions) — Schematic Plan
- Rook + 2 Connected Pawns vs Rook — Win/Draw Landmarks
- Rook + 2 Connected Pawns vs Rook — Conversion Technique
- Rook + 2 Connected Pawns vs Rook — Defensive Hold
- Rook + 2 Connected Pawns vs Rook — Common Blunders
- Rook + 2 Connected Pawns vs Rook — King Activation
- Rook + 2 Connected Pawns vs Rook — Tempo Counting
- Rook + 2 Connected Pawns vs Rook — Increment Execution
- Rook + 2 Connected Pawns vs Rook — Both-Sides AI Drill
- Rook + 2 Connected Pawns vs Rook — When to Trade
- Rook + 2 Connected Pawns vs Rook — Schematic Plan
- Rook + 2 Isolated Pawns vs Rook — Win/Draw Landmarks
- Rook + 2 Isolated Pawns vs Rook — Conversion Technique
- Rook + 2 Isolated Pawns vs Rook — Defensive Hold
- Rook + 2 Isolated Pawns vs Rook — Common Blunders
- Rook + 2 Isolated Pawns vs Rook — King Activation
- Rook + 2 Isolated Pawns vs Rook — Tempo Counting
- Rook + 2 Isolated Pawns vs Rook — Increment Execution
- Rook + 2 Isolated Pawns vs Rook — Both-Sides AI Drill
- Rook + 2 Isolated Pawns vs Rook — When to Trade
- Rook + 2 Isolated Pawns vs Rook — Schematic Plan
- Rook + f- and h-Pawns vs Rook — Win/Draw Landmarks
- Rook + f- and h-Pawns vs Rook — Conversion Technique
- Rook + f- and h-Pawns vs Rook — Defensive Hold
- Rook + f- and h-Pawns vs Rook — Common Blunders
- Rook + f- and h-Pawns vs Rook — King Activation
- Rook + f- and h-Pawns vs Rook — Tempo Counting
- Rook + f- and h-Pawns vs Rook — Increment Execution
- Rook + f- and h-Pawns vs Rook — Both-Sides AI Drill
- Rook + f- and h-Pawns vs Rook — When to Trade
- Rook + f- and h-Pawns vs Rook — Schematic Plan
- Rook + 4 Pawns vs Rook + 3 Pawns (One Flank) — Win/Draw Landmarks
- Rook + 4 Pawns vs Rook + 3 Pawns (One Flank) — Conversion Technique
- Rook + 4 Pawns vs Rook + 3 Pawns (One Flank) — Defensive Hold
- Rook + 4 Pawns vs Rook + 3 Pawns (One Flank) — Common Blunders
- Rook + 4 Pawns vs Rook + 3 Pawns (One Flank) — King Activation
- Rook + 4 Pawns vs Rook + 3 Pawns (One Flank) — Tempo Counting
- Rook + 4 Pawns vs Rook + 3 Pawns (One Flank) — Increment Execution
- Rook + 4 Pawns vs Rook + 3 Pawns (One Flank) — Both-Sides AI Drill
- Rook + 4 Pawns vs Rook + 3 Pawns (One Flank) — When to Trade
- Rook + 4 Pawns vs Rook + 3 Pawns (One Flank) — Schematic Plan
- Active Rook Sacrifice for Pawn Activity — Win/Draw Landmarks
- Active Rook Sacrifice for Pawn Activity — Conversion Technique
- Active Rook Sacrifice for Pawn Activity — Defensive Hold
- Active Rook Sacrifice for Pawn Activity — Common Blunders
- Active Rook Sacrifice for Pawn Activity — King Activation
- Active Rook Sacrifice for Pawn Activity — Tempo Counting
- Active Rook Sacrifice for Pawn Activity — Increment Execution
- Active Rook Sacrifice for Pawn Activity — Both-Sides AI Drill
- Active Rook Sacrifice for Pawn Activity — When to Trade
- Active Rook Sacrifice for Pawn Activity — Schematic Plan
- 7th Rank Absolute Rook Dominance — Win/Draw Landmarks
- 7th Rank Absolute Rook Dominance — Conversion Technique
- 7th Rank Absolute Rook Dominance — Defensive Hold
- 7th Rank Absolute Rook Dominance — Common Blunders
- 7th Rank Absolute Rook Dominance — King Activation
- 7th Rank Absolute Rook Dominance — Tempo Counting
- 7th Rank Absolute Rook Dominance — Increment Execution
- 7th Rank Absolute Rook Dominance — Both-Sides AI Drill
- 7th Rank Absolute Rook Dominance — When to Trade
- 7th Rank Absolute Rook Dominance — Schematic Plan
- Same-Color Bishop Endgame (Pawns on Wrong Color) — Win/Draw Landmarks
- Same-Color Bishop Endgame (Pawns on Wrong Color) — Conversion Technique
- Same-Color Bishop Endgame (Pawns on Wrong Color) — Defensive Hold
- Same-Color Bishop Endgame (Pawns on Wrong Color) — Common Blunders
- Same-Color Bishop Endgame (Pawns on Wrong Color) — King Activation
- Same-Color Bishop Endgame (Pawns on Wrong Color) — Tempo Counting
- Same-Color Bishop Endgame (Pawns on Wrong Color) — Increment Execution
- Same-Color Bishop Endgame (Pawns on Wrong Color) — Both-Sides AI Drill
- Same-Color Bishop Endgame (Pawns on Wrong Color) — When to Trade
- Same-Color Bishop Endgame (Pawns on Wrong Color) — Schematic Plan
- Centurini's Rule in Bishop + Pawn vs Bishop — Win/Draw Landmarks
- Centurini's Rule in Bishop + Pawn vs Bishop — Conversion Technique
- Centurini's Rule in Bishop + Pawn vs Bishop — Defensive Hold
- Centurini's Rule in Bishop + Pawn vs Bishop — Common Blunders
- Centurini's Rule in Bishop + Pawn vs Bishop — King Activation
- Centurini's Rule in Bishop + Pawn vs Bishop — Tempo Counting
- Centurini's Rule in Bishop + Pawn vs Bishop — Increment Execution
- Centurini's Rule in Bishop + Pawn vs Bishop — Both-Sides AI Drill
- Centurini's Rule in Bishop + Pawn vs Bishop — When to Trade
- Centurini's Rule in Bishop + Pawn vs Bishop — Schematic Plan
- Opposite-Color Bishops (Drawing with 2 Pawns Down) — Win/Draw Landmarks
- Opposite-Color Bishops (Drawing with 2 Pawns Down) — Conversion Technique
- Opposite-Color Bishops (Drawing with 2 Pawns Down) — Defensive Hold
- Opposite-Color Bishops (Drawing with 2 Pawns Down) — Common Blunders
- Opposite-Color Bishops (Drawing with 2 Pawns Down) — King Activation
- Opposite-Color Bishops (Drawing with 2 Pawns Down) — Tempo Counting
- Opposite-Color Bishops (Drawing with 2 Pawns Down) — Increment Execution
- Opposite-Color Bishops (Drawing with 2 Pawns Down) — Both-Sides AI Drill
- Opposite-Color Bishops (Drawing with 2 Pawns Down) — When to Trade
- Opposite-Color Bishops (Drawing with 2 Pawns Down) — Schematic Plan
- Opposite-Color Bishops (Winning with Separated Passed Pawns) — Win/Draw Landmarks
- Opposite-Color Bishops (Winning with Separated Passed Pawns) — Conversion Technique
- Opposite-Color Bishops (Winning with Separated Passed Pawns) — Defensive Hold
- Opposite-Color Bishops (Winning with Separated Passed Pawns) — Common Blunders
- Opposite-Color Bishops (Winning with Separated Passed Pawns) — King Activation
- Opposite-Color Bishops (Winning with Separated Passed Pawns) — Tempo Counting
- Opposite-Color Bishops (Winning with Separated Passed Pawns) — Increment Execution
- Opposite-Color Bishops (Winning with Separated Passed Pawns) — Both-Sides AI Drill
- Opposite-Color Bishops (Winning with Separated Passed Pawns) — When to Trade
- Opposite-Color Bishops (Winning with Separated Passed Pawns) — Schematic Plan
- Good Knight vs Bad Bishop (Fixed Central Pawns) — Win/Draw Landmarks
- Good Knight vs Bad Bishop (Fixed Central Pawns) — Conversion Technique
- Good Knight vs Bad Bishop (Fixed Central Pawns) — Defensive Hold
- Good Knight vs Bad Bishop (Fixed Central Pawns) — Common Blunders
- Good Knight vs Bad Bishop (Fixed Central Pawns) — King Activation
- Good Knight vs Bad Bishop (Fixed Central Pawns) — Tempo Counting
- Good Knight vs Bad Bishop (Fixed Central Pawns) — Increment Execution
- Good Knight vs Bad Bishop (Fixed Central Pawns) — Both-Sides AI Drill
- Good Knight vs Bad Bishop (Fixed Central Pawns) — When to Trade
- Good Knight vs Bad Bishop (Fixed Central Pawns) — Schematic Plan
- Two Bishops vs Bishop + Knight Advantage — Win/Draw Landmarks
- Two Bishops vs Bishop + Knight Advantage — Conversion Technique
- Two Bishops vs Bishop + Knight Advantage — Defensive Hold
- Two Bishops vs Bishop + Knight Advantage — Common Blunders
- Two Bishops vs Bishop + Knight Advantage — King Activation
- Two Bishops vs Bishop + Knight Advantage — Tempo Counting
- Two Bishops vs Bishop + Knight Advantage — Increment Execution
- Two Bishops vs Bishop + Knight Advantage — Both-Sides AI Drill
- Two Bishops vs Bishop + Knight Advantage — When to Trade
- Two Bishops vs Bishop + Knight Advantage — Schematic Plan
- Two Bishops vs Two Knights Open Board — Win/Draw Landmarks
- Two Bishops vs Two Knights Open Board — Conversion Technique
- Two Bishops vs Two Knights Open Board — Defensive Hold
- Two Bishops vs Two Knights Open Board — Common Blunders
- Two Bishops vs Two Knights Open Board — King Activation
- Two Bishops vs Two Knights Open Board — Tempo Counting
- Two Bishops vs Two Knights Open Board — Increment Execution
- Two Bishops vs Two Knights Open Board — Both-Sides AI Drill
- Two Bishops vs Two Knights Open Board — When to Trade
- Two Bishops vs Two Knights Open Board — Schematic Plan
- Knight + Pawn vs Knight (Stopping the Pawn) — Win/Draw Landmarks
- Knight + Pawn vs Knight (Stopping the Pawn) — Conversion Technique
- Knight + Pawn vs Knight (Stopping the Pawn) — Defensive Hold
- Knight + Pawn vs Knight (Stopping the Pawn) — Common Blunders
- Knight + Pawn vs Knight (Stopping the Pawn) — King Activation
- Knight + Pawn vs Knight (Stopping the Pawn) — Tempo Counting
- Knight + Pawn vs Knight (Stopping the Pawn) — Increment Execution
- Knight + Pawn vs Knight (Stopping the Pawn) — Both-Sides AI Drill
- Knight + Pawn vs Knight (Stopping the Pawn) — When to Trade
- Knight + Pawn vs Knight (Stopping the Pawn) — Schematic Plan
- Knight Outflanking & Tempo Calculation — Win/Draw Landmarks
- Knight Outflanking & Tempo Calculation — Conversion Technique
- Knight Outflanking & Tempo Calculation — Defensive Hold
- Knight Outflanking & Tempo Calculation — Common Blunders
- Knight Outflanking & Tempo Calculation — King Activation
- Knight Outflanking & Tempo Calculation — Tempo Counting
- Knight Outflanking & Tempo Calculation — Increment Execution
- Knight Outflanking & Tempo Calculation — Both-Sides AI Drill
- Knight Outflanking & Tempo Calculation — When to Trade
- Knight Outflanking & Tempo Calculation — Schematic Plan
- Trapping the Knight at the Board Edge — Win/Draw Landmarks
- Trapping the Knight at the Board Edge — Conversion Technique
- Trapping the Knight at the Board Edge — Defensive Hold
- Trapping the Knight at the Board Edge — Common Blunders
- Trapping the Knight at the Board Edge — King Activation
- Trapping the Knight at the Board Edge — Tempo Counting
- Trapping the Knight at the Board Edge — Increment Execution
- Trapping the Knight at the Board Edge — Both-Sides AI Drill
- Trapping the Knight at the Board Edge — When to Trade
- Trapping the Knight at the Board Edge — Schematic Plan
- Queen + Pawn vs Queen (Cross-Check Zones) — Win/Draw Landmarks
- Queen + Pawn vs Queen (Cross-Check Zones) — Conversion Technique
- Queen + Pawn vs Queen (Cross-Check Zones) — Defensive Hold
- Queen + Pawn vs Queen (Cross-Check Zones) — Common Blunders
- Queen + Pawn vs Queen (Cross-Check Zones) — King Activation
- Queen + Pawn vs Queen (Cross-Check Zones) — Tempo Counting
- Queen + Pawn vs Queen (Cross-Check Zones) — Increment Execution
- Queen + Pawn vs Queen (Cross-Check Zones) — Both-Sides AI Drill
- Queen + Pawn vs Queen (Cross-Check Zones) — When to Trade
- Queen + Pawn vs Queen (Cross-Check Zones) — Schematic Plan
- Queen Endgame Centralization vs Perpetual Check — Win/Draw Landmarks
- Queen Endgame Centralization vs Perpetual Check — Conversion Technique
- Queen Endgame Centralization vs Perpetual Check — Defensive Hold
- Queen Endgame Centralization vs Perpetual Check — Common Blunders
- Queen Endgame Centralization vs Perpetual Check — King Activation
- Queen Endgame Centralization vs Perpetual Check — Tempo Counting
- Queen Endgame Centralization vs Perpetual Check — Increment Execution
- Queen Endgame Centralization vs Perpetual Check — Both-Sides AI Drill
- Queen Endgame Centralization vs Perpetual Check — When to Trade
- Queen Endgame Centralization vs Perpetual Check — Schematic Plan
- Rook vs Bishop + Pawns Fortress — Win/Draw Landmarks
- Rook vs Bishop + Pawns Fortress — Conversion Technique
- Rook vs Bishop + Pawns Fortress — Defensive Hold
- Rook vs Bishop + Pawns Fortress — Common Blunders
- Rook vs Bishop + Pawns Fortress — King Activation
- Rook vs Bishop + Pawns Fortress — Tempo Counting
- Rook vs Bishop + Pawns Fortress — Increment Execution
- Rook vs Bishop + Pawns Fortress — Both-Sides AI Drill
- Rook vs Bishop + Pawns Fortress — When to Trade
- Rook vs Bishop + Pawns Fortress — Schematic Plan
- Rook vs Knight + Pawns Defense — Win/Draw Landmarks
- Rook vs Knight + Pawns Defense — Conversion Technique
- Rook vs Knight + Pawns Defense — Defensive Hold
- Rook vs Knight + Pawns Defense — Common Blunders
- Rook vs Knight + Pawns Defense — King Activation
- Rook vs Knight + Pawns Defense — Tempo Counting
- Rook vs Knight + Pawns Defense — Increment Execution
- Rook vs Knight + Pawns Defense — Both-Sides AI Drill
- Rook vs Knight + Pawns Defense — When to Trade
- Rook vs Knight + Pawns Defense — Schematic Plan
- Rook + Bishop vs Rook (Cochrane Defense) — Win/Draw Landmarks
- Rook + Bishop vs Rook (Cochrane Defense) — Conversion Technique
- Rook + Bishop vs Rook (Cochrane Defense) — Defensive Hold
- Rook + Bishop vs Rook (Cochrane Defense) — Common Blunders
- Rook + Bishop vs Rook (Cochrane Defense) — King Activation
- Rook + Bishop vs Rook (Cochrane Defense) — Tempo Counting
- Rook + Bishop vs Rook (Cochrane Defense) — Increment Execution
- Rook + Bishop vs Rook (Cochrane Defense) — Both-Sides AI Drill
- Rook + Bishop vs Rook (Cochrane Defense) — When to Trade
- Rook + Bishop vs Rook (Cochrane Defense) — Schematic Plan
- Rook + Knight vs Rook (Second-Rank Defense) — Win/Draw Landmarks
- Rook + Knight vs Rook (Second-Rank Defense) — Conversion Technique
- Rook + Knight vs Rook (Second-Rank Defense) — Defensive Hold
- Rook + Knight vs Rook (Second-Rank Defense) — Common Blunders
- Rook + Knight vs Rook (Second-Rank Defense) — King Activation
- Rook + Knight vs Rook (Second-Rank Defense) — Tempo Counting
- Rook + Knight vs Rook (Second-Rank Defense) — Increment Execution
- Rook + Knight vs Rook (Second-Rank Defense) — Both-Sides AI Drill
- Rook + Knight vs Rook (Second-Rank Defense) — When to Trade
- Rook + Knight vs Rook (Second-Rank Defense) — Schematic Plan
- Queen vs Rook Philidor Fortress — Win/Draw Landmarks
- Queen vs Rook Philidor Fortress — Conversion Technique
- Queen vs Rook Philidor Fortress — Defensive Hold
- Queen vs Rook Philidor Fortress — Common Blunders
- Queen vs Rook Philidor Fortress — King Activation
- Queen vs Rook Philidor Fortress — Tempo Counting
- Queen vs Rook Philidor Fortress — Increment Execution
- Queen vs Rook Philidor Fortress — Both-Sides AI Drill
- Queen vs Rook Philidor Fortress — When to Trade
- Queen vs Rook Philidor Fortress — Schematic Plan
- Queen vs Two Rooks Coordination — Win/Draw Landmarks
- Queen vs Two Rooks Coordination — Conversion Technique
- Queen vs Two Rooks Coordination — Defensive Hold
- Queen vs Two Rooks Coordination — Common Blunders
- Queen vs Two Rooks Coordination — King Activation
- Queen vs Two Rooks Coordination — Tempo Counting
- Queen vs Two Rooks Coordination — Increment Execution
- Queen vs Two Rooks Coordination — Both-Sides AI Drill
- Queen vs Two Rooks Coordination — When to Trade
- Queen vs Two Rooks Coordination — Schematic Plan
- Queen vs Rook + Minor Piece Fortress — Win/Draw Landmarks
- Queen vs Rook + Minor Piece Fortress — Conversion Technique
- Queen vs Rook + Minor Piece Fortress — Defensive Hold
- Queen vs Rook + Minor Piece Fortress — Common Blunders
- Queen vs Rook + Minor Piece Fortress — King Activation
- Queen vs Rook + Minor Piece Fortress — Tempo Counting
- Queen vs Rook + Minor Piece Fortress — Increment Execution
- Queen vs Rook + Minor Piece Fortress — Both-Sides AI Drill
- Queen vs Rook + Minor Piece Fortress — When to Trade
- Queen vs Rook + Minor Piece Fortress — Schematic Plan
- Three Minor Pieces vs Queen — Win/Draw Landmarks
- Three Minor Pieces vs Queen — Conversion Technique
- Three Minor Pieces vs Queen — Defensive Hold
- Three Minor Pieces vs Queen — Common Blunders
- Three Minor Pieces vs Queen — King Activation
- Three Minor Pieces vs Queen — Tempo Counting
- Three Minor Pieces vs Queen — Increment Execution
- Three Minor Pieces vs Queen — Both-Sides AI Drill
- Three Minor Pieces vs Queen — When to Trade
- Three Minor Pieces vs Queen — Schematic Plan
- Réti Endgame Study (Dual Threat King Path) — Win/Draw Landmarks
- Réti Endgame Study (Dual Threat King Path) — Conversion Technique
- Réti Endgame Study (Dual Threat King Path) — Defensive Hold
- Réti Endgame Study (Dual Threat King Path) — Common Blunders
- Réti Endgame Study (Dual Threat King Path) — King Activation
- Réti Endgame Study (Dual Threat King Path) — Tempo Counting
- Réti Endgame Study (Dual Threat King Path) — Increment Execution
- Réti Endgame Study (Dual Threat King Path) — Both-Sides AI Drill
- Réti Endgame Study (Dual Threat King Path) — When to Trade
- Réti Endgame Study (Dual Threat King Path) — Schematic Plan
- Saavedra Position (Underpromotion to Rook c8=R!) — Win/Draw Landmarks
- Saavedra Position (Underpromotion to Rook c8=R!) — Conversion Technique
- Saavedra Position (Underpromotion to Rook c8=R!) — Defensive Hold
- Saavedra Position (Underpromotion to Rook c8=R!) — Common Blunders
- Saavedra Position (Underpromotion to Rook c8=R!) — King Activation
- Saavedra Position (Underpromotion to Rook c8=R!) — Tempo Counting
- Saavedra Position (Underpromotion to Rook c8=R!) — Increment Execution
- Saavedra Position (Underpromotion to Rook c8=R!) — Both-Sides AI Drill
- Saavedra Position (Underpromotion to Rook c8=R!) — When to Trade
- Saavedra Position (Underpromotion to Rook c8=R!) — Schematic Plan
- Lasker's Rook Endgame Staircase — Win/Draw Landmarks
- Lasker's Rook Endgame Staircase — Conversion Technique
- Lasker's Rook Endgame Staircase — Defensive Hold
- Lasker's Rook Endgame Staircase — Common Blunders
- Lasker's Rook Endgame Staircase — King Activation
- Lasker's Rook Endgame Staircase — Tempo Counting
- Lasker's Rook Endgame Staircase — Increment Execution
- Lasker's Rook Endgame Staircase — Both-Sides AI Drill
- Lasker's Rook Endgame Staircase — When to Trade
- Lasker's Rook Endgame Staircase — Schematic Plan
- Capablanca's Tartakower Rook Ending — Win/Draw Landmarks
- Capablanca's Tartakower Rook Ending — Conversion Technique
- Capablanca's Tartakower Rook Ending — Defensive Hold
- Capablanca's Tartakower Rook Ending — Common Blunders
- Capablanca's Tartakower Rook Ending — King Activation
- Capablanca's Tartakower Rook Ending — Tempo Counting
- Capablanca's Tartakower Rook Ending — Increment Execution
- Capablanca's Tartakower Rook Ending — Both-Sides AI Drill
- Capablanca's Tartakower Rook Ending — When to Trade
- Capablanca's Tartakower Rook Ending — Schematic Plan
- Rubinstein's Classic Rook Endgame Technique — Win/Draw Landmarks
- Rubinstein's Classic Rook Endgame Technique — Conversion Technique
- Rubinstein's Classic Rook Endgame Technique — Defensive Hold
- Rubinstein's Classic Rook Endgame Technique — Common Blunders
- Rubinstein's Classic Rook Endgame Technique — King Activation
- Rubinstein's Classic Rook Endgame Technique — Tempo Counting
- Rubinstein's Classic Rook Endgame Technique — Increment Execution
- Rubinstein's Classic Rook Endgame Technique — Both-Sides AI Drill
- Rubinstein's Classic Rook Endgame Technique — When to Trade
- Rubinstein's Classic Rook Endgame Technique — Schematic Plan
- Karpov's Principle of Two Weaknesses — Win/Draw Landmarks
- Karpov's Principle of Two Weaknesses — Conversion Technique
- Karpov's Principle of Two Weaknesses — Defensive Hold
- Karpov's Principle of Two Weaknesses — Common Blunders
- Karpov's Principle of Two Weaknesses — King Activation
- Karpov's Principle of Two Weaknesses — Tempo Counting
- Karpov's Principle of Two Weaknesses — Increment Execution
- Karpov's Principle of Two Weaknesses — Both-Sides AI Drill
- Karpov's Principle of Two Weaknesses — When to Trade
- Karpov's Principle of Two Weaknesses — Schematic Plan
- Carlsen's Grind in Equal Rook Endings — Win/Draw Landmarks
- Carlsen's Grind in Equal Rook Endings — Conversion Technique
- Carlsen's Grind in Equal Rook Endings — Defensive Hold
- Carlsen's Grind in Equal Rook Endings — Common Blunders
- Carlsen's Grind in Equal Rook Endings — King Activation
- Carlsen's Grind in Equal Rook Endings — Tempo Counting
- Carlsen's Grind in Equal Rook Endings — Increment Execution
- Carlsen's Grind in Equal Rook Endings — Both-Sides AI Drill
- Carlsen's Grind in Equal Rook Endings — When to Trade
- Carlsen's Grind in Equal Rook Endings — Schematic Plan
- Fischer's Bishop vs Knight Squeeze — Win/Draw Landmarks
- Fischer's Bishop vs Knight Squeeze — Conversion Technique
- Fischer's Bishop vs Knight Squeeze — Defensive Hold
- Fischer's Bishop vs Knight Squeeze — Common Blunders
- Fischer's Bishop vs Knight Squeeze — King Activation
- Fischer's Bishop vs Knight Squeeze — Tempo Counting
- Fischer's Bishop vs Knight Squeeze — Increment Execution
- Fischer's Bishop vs Knight Squeeze — Both-Sides AI Drill
- Fischer's Bishop vs Knight Squeeze — When to Trade
- Fischer's Bishop vs Knight Squeeze — Schematic Plan
- Botvinnik's Passed Pawn Blockade — Win/Draw Landmarks
- Botvinnik's Passed Pawn Blockade — Conversion Technique
- Botvinnik's Passed Pawn Blockade — Defensive Hold
- Botvinnik's Passed Pawn Blockade — Common Blunders
- Botvinnik's Passed Pawn Blockade — King Activation
- Botvinnik's Passed Pawn Blockade — Tempo Counting
- Botvinnik's Passed Pawn Blockade — Increment Execution
- Botvinnik's Passed Pawn Blockade — Both-Sides AI Drill
- Botvinnik's Passed Pawn Blockade — When to Trade
- Botvinnik's Passed Pawn Blockade — Schematic Plan
- Smyslov's Rook Activity Transition — Win/Draw Landmarks
- Smyslov's Rook Activity Transition — Conversion Technique
- Smyslov's Rook Activity Transition — Defensive Hold
- Smyslov's Rook Activity Transition — Common Blunders
- Smyslov's Rook Activity Transition — King Activation
- Smyslov's Rook Activity Transition — Tempo Counting
- Smyslov's Rook Activity Transition — Increment Execution
- Smyslov's Rook Activity Transition — Both-Sides AI Drill
- Smyslov's Rook Activity Transition — When to Trade
- Smyslov's Rook Activity Transition — Schematic Plan
- Isolated Queen's Pawn (IQP) Endgame Simplification — Win/Draw Landmarks
- Isolated Queen's Pawn (IQP) Endgame Simplification — Conversion Technique
- Isolated Queen's Pawn (IQP) Endgame Simplification — Defensive Hold
- Isolated Queen's Pawn (IQP) Endgame Simplification — Common Blunders
- Isolated Queen's Pawn (IQP) Endgame Simplification — King Activation
- Isolated Queen's Pawn (IQP) Endgame Simplification — Tempo Counting
- Isolated Queen's Pawn (IQP) Endgame Simplification — Increment Execution
- Isolated Queen's Pawn (IQP) Endgame Simplification — Both-Sides AI Drill
- Isolated Queen's Pawn (IQP) Endgame Simplification — When to Trade
- Isolated Queen's Pawn (IQP) Endgame Simplification — Schematic Plan
- Hanging Pawns Endgame Transition — Win/Draw Landmarks
- Hanging Pawns Endgame Transition — Conversion Technique
- Hanging Pawns Endgame Transition — Defensive Hold
- Hanging Pawns Endgame Transition — Common Blunders
- Hanging Pawns Endgame Transition — King Activation
- Hanging Pawns Endgame Transition — Tempo Counting
- Hanging Pawns Endgame Transition — Increment Execution
- Hanging Pawns Endgame Transition — Both-Sides AI Drill
- Hanging Pawns Endgame Transition — When to Trade
- Hanging Pawns Endgame Transition — Schematic Plan
- Carlsbad Queenside Minority Endgame — Win/Draw Landmarks
- Carlsbad Queenside Minority Endgame — Conversion Technique
- Carlsbad Queenside Minority Endgame — Defensive Hold
- Carlsbad Queenside Minority Endgame — Common Blunders
- Carlsbad Queenside Minority Endgame — King Activation
- Carlsbad Queenside Minority Endgame — Tempo Counting
- Carlsbad Queenside Minority Endgame — Increment Execution
- Carlsbad Queenside Minority Endgame — Both-Sides AI Drill
- Carlsbad Queenside Minority Endgame — When to Trade
- Carlsbad Queenside Minority Endgame — Schematic Plan
- Doubled c-Pawns Structural Compensation — Win/Draw Landmarks
- Doubled c-Pawns Structural Compensation — Conversion Technique
- Doubled c-Pawns Structural Compensation — Defensive Hold
- Doubled c-Pawns Structural Compensation — Common Blunders
- Doubled c-Pawns Structural Compensation — King Activation
- Doubled c-Pawns Structural Compensation — Tempo Counting
- Doubled c-Pawns Structural Compensation — Increment Execution
- Doubled c-Pawns Structural Compensation — Both-Sides AI Drill
- Doubled c-Pawns Structural Compensation — When to Trade
- Doubled c-Pawns Structural Compensation — Schematic Plan
- Backward Pawn on Half-Open File — Win/Draw Landmarks
- Backward Pawn on Half-Open File — Conversion Technique
- Backward Pawn on Half-Open File — Defensive Hold
- Backward Pawn on Half-Open File — Common Blunders
- Backward Pawn on Half-Open File — King Activation
- Backward Pawn on Half-Open File — Tempo Counting
- Backward Pawn on Half-Open File — Increment Execution
- Backward Pawn on Half-Open File — Both-Sides AI Drill
- Backward Pawn on Half-Open File — When to Trade
- Backward Pawn on Half-Open File — Schematic Plan
- Protected Passed d-Pawn vs Kingside Majority — Win/Draw Landmarks
- Protected Passed d-Pawn vs Kingside Majority — Conversion Technique
- Protected Passed d-Pawn vs Kingside Majority — Defensive Hold
- Protected Passed d-Pawn vs Kingside Majority — Common Blunders
- Protected Passed d-Pawn vs Kingside Majority — King Activation
- Protected Passed d-Pawn vs Kingside Majority — Tempo Counting
- Protected Passed d-Pawn vs Kingside Majority — Increment Execution
- Protected Passed d-Pawn vs Kingside Majority — Both-Sides AI Drill
- Protected Passed d-Pawn vs Kingside Majority — When to Trade
- Protected Passed d-Pawn vs Kingside Majority — Schematic Plan
- Queenside 3-vs-2 Pawn Majority Creation — Win/Draw Landmarks
- Queenside 3-vs-2 Pawn Majority Creation — Conversion Technique
- Queenside 3-vs-2 Pawn Majority Creation — Defensive Hold
- Queenside 3-vs-2 Pawn Majority Creation — Common Blunders
- Queenside 3-vs-2 Pawn Majority Creation — King Activation
- Queenside 3-vs-2 Pawn Majority Creation — Tempo Counting
- Queenside 3-vs-2 Pawn Majority Creation — Increment Execution
- Queenside 3-vs-2 Pawn Majority Creation — Both-Sides AI Drill
- Queenside 3-vs-2 Pawn Majority Creation — When to Trade
- Queenside 3-vs-2 Pawn Majority Creation — Schematic Plan
- Central King March Activation — Win/Draw Landmarks
- Central King March Activation — Conversion Technique
- Central King March Activation — Defensive Hold
- Central King March Activation — Common Blunders
- Central King March Activation — King Activation
- Central King March Activation — Tempo Counting
- Central King March Activation — Increment Execution
- Central King March Activation — Both-Sides AI Drill
- Central King March Activation — When to Trade
- Central King March Activation — Schematic Plan
- Zugzwang Squeeze in Locked Pawn Chains — Win/Draw Landmarks
- Zugzwang Squeeze in Locked Pawn Chains — Conversion Technique
- Zugzwang Squeeze in Locked Pawn Chains — Defensive Hold
- Zugzwang Squeeze in Locked Pawn Chains — Common Blunders
- Zugzwang Squeeze in Locked Pawn Chains — King Activation
- Zugzwang Squeeze in Locked Pawn Chains — Tempo Counting
- Zugzwang Squeeze in Locked Pawn Chains — Increment Execution
- Zugzwang Squeeze in Locked Pawn Chains — Both-Sides AI Drill
- Zugzwang Squeeze in Locked Pawn Chains — When to Trade
- Zugzwang Squeeze in Locked Pawn Chains — Schematic Plan
- Fortress Construction When Down the Exchange — Win/Draw Landmarks
- Fortress Construction When Down the Exchange — Conversion Technique
- Fortress Construction When Down the Exchange — Defensive Hold
- Fortress Construction When Down the Exchange — Common Blunders
- Fortress Construction When Down the Exchange — King Activation
- Fortress Construction When Down the Exchange — Tempo Counting
- Fortress Construction When Down the Exchange — Increment Execution
- Fortress Construction When Down the Exchange — Both-Sides AI Drill
- Fortress Construction When Down the Exchange — When to Trade
- Fortress Construction When Down the Exchange — Schematic Plan
- Stalemate Traps in Lost Rook Endings — Win/Draw Landmarks
- Stalemate Traps in Lost Rook Endings — Conversion Technique
- Stalemate Traps in Lost Rook Endings — Defensive Hold
- Stalemate Traps in Lost Rook Endings — Common Blunders
- Stalemate Traps in Lost Rook Endings — King Activation
- Stalemate Traps in Lost Rook Endings — Tempo Counting
- Stalemate Traps in Lost Rook Endings — Increment Execution
- Stalemate Traps in Lost Rook Endings — Both-Sides AI Drill
- Stalemate Traps in Lost Rook Endings — When to Trade
- Stalemate Traps in Lost Rook Endings — Schematic Plan
- Stalemate Traps in Lost Queen Endings — Win/Draw Landmarks
- Stalemate Traps in Lost Queen Endings — Conversion Technique
- Stalemate Traps in Lost Queen Endings — Defensive Hold
- Stalemate Traps in Lost Queen Endings — Common Blunders
- Stalemate Traps in Lost Queen Endings — King Activation
- Stalemate Traps in Lost Queen Endings — Tempo Counting
- Stalemate Traps in Lost Queen Endings — Increment Execution
- Stalemate Traps in Lost Queen Endings — Both-Sides AI Drill
- Stalemate Traps in Lost Queen Endings — When to Trade
- Stalemate Traps in Lost Queen Endings — Schematic Plan
- Desperado Rook (Mad Rook) Perpetual — Win/Draw Landmarks
- Desperado Rook (Mad Rook) Perpetual — Conversion Technique
- Desperado Rook (Mad Rook) Perpetual — Defensive Hold
- Desperado Rook (Mad Rook) Perpetual — Common Blunders
- Desperado Rook (Mad Rook) Perpetual — King Activation
- Desperado Rook (Mad Rook) Perpetual — Tempo Counting
- Desperado Rook (Mad Rook) Perpetual — Increment Execution
- Desperado Rook (Mad Rook) Perpetual — Both-Sides AI Drill
- Desperado Rook (Mad Rook) Perpetual — When to Trade
- Desperado Rook (Mad Rook) Perpetual — Schematic Plan
- 6-Piece Syzygy Tablebase Exact Conversion — Win/Draw Landmarks
- 6-Piece Syzygy Tablebase Exact Conversion — Conversion Technique
- 6-Piece Syzygy Tablebase Exact Conversion — Defensive Hold
- 6-Piece Syzygy Tablebase Exact Conversion — Common Blunders
- 6-Piece Syzygy Tablebase Exact Conversion — King Activation
- 6-Piece Syzygy Tablebase Exact Conversion — Tempo Counting
- 6-Piece Syzygy Tablebase Exact Conversion — Increment Execution
- 6-Piece Syzygy Tablebase Exact Conversion — Both-Sides AI Drill
- 6-Piece Syzygy Tablebase Exact Conversion — When to Trade
- 6-Piece Syzygy Tablebase Exact Conversion — Schematic Plan
- 5-Piece Tablebase No-Progress Defense — Win/Draw Landmarks
- 5-Piece Tablebase No-Progress Defense — Conversion Technique
- 5-Piece Tablebase No-Progress Defense — Defensive Hold
- 5-Piece Tablebase No-Progress Defense — Common Blunders
- 5-Piece Tablebase No-Progress Defense — King Activation
- 5-Piece Tablebase No-Progress Defense — Tempo Counting
- 5-Piece Tablebase No-Progress Defense — Increment Execution
- 5-Piece Tablebase No-Progress Defense — Both-Sides AI Drill
- 5-Piece Tablebase No-Progress Defense — When to Trade
- 5-Piece Tablebase No-Progress Defense — Schematic Plan
- 50-Move Rule Practical Defense — Win/Draw Landmarks
- 50-Move Rule Practical Defense — Conversion Technique
- 50-Move Rule Practical Defense — Defensive Hold
- 50-Move Rule Practical Defense — Common Blunders
- 50-Move Rule Practical Defense — King Activation
- 50-Move Rule Practical Defense — Tempo Counting
- 50-Move Rule Practical Defense — Increment Execution
- 50-Move Rule Practical Defense — Both-Sides AI Drill
- 50-Move Rule Practical Defense — When to Trade
- 50-Move Rule Practical Defense — Schematic Plan
- Threefold Repetition Perpetual Escape — Win/Draw Landmarks
- Threefold Repetition Perpetual Escape — Conversion Technique
- Threefold Repetition Perpetual Escape — Defensive Hold
- Threefold Repetition Perpetual Escape — Common Blunders
- Threefold Repetition Perpetual Escape — King Activation
- Threefold Repetition Perpetual Escape — Tempo Counting
- Threefold Repetition Perpetual Escape — Increment Execution
- Threefold Repetition Perpetual Escape — Both-Sides AI Drill
- Threefold Repetition Perpetual Escape — When to Trade
- Threefold Repetition Perpetual Escape — Schematic Plan
- Converting an Extra Pawn in Blitz Increment — Win/Draw Landmarks
- Converting an Extra Pawn in Blitz Increment — Conversion Technique
- Converting an Extra Pawn in Blitz Increment — Defensive Hold
- Converting an Extra Pawn in Blitz Increment — Common Blunders
- Converting an Extra Pawn in Blitz Increment — King Activation
- Converting an Extra Pawn in Blitz Increment — Tempo Counting
- Converting an Extra Pawn in Blitz Increment — Increment Execution
- Converting an Extra Pawn in Blitz Increment — Both-Sides AI Drill
- Converting an Extra Pawn in Blitz Increment — When to Trade
- Converting an Extra Pawn in Blitz Increment — Schematic Plan
- Defending Slightly Worse Endings Without Panicking — Win/Draw Landmarks
- Defending Slightly Worse Endings Without Panicking — Conversion Technique
- Defending Slightly Worse Endings Without Panicking — Defensive Hold
- Defending Slightly Worse Endings Without Panicking — Common Blunders
- Defending Slightly Worse Endings Without Panicking — King Activation
- Defending Slightly Worse Endings Without Panicking — Tempo Counting
- Defending Slightly Worse Endings Without Panicking — Increment Execution
- Defending Slightly Worse Endings Without Panicking — Both-Sides AI Drill
- Defending Slightly Worse Endings Without Panicking — When to Trade
- Defending Slightly Worse Endings Without Panicking — Schematic Plan
- Trading Queens at the Right Moment — Win/Draw Landmarks
- Trading Queens at the Right Moment — Conversion Technique
- Trading Queens at the Right Moment — Defensive Hold
- Trading Queens at the Right Moment — Common Blunders
- Trading Queens at the Right Moment — King Activation
- Trading Queens at the Right Moment — Tempo Counting
- Trading Queens at the Right Moment — Increment Execution
- Trading Queens at the Right Moment — Both-Sides AI Drill
- Trading Queens at the Right Moment — When to Trade
- Trading Queens at the Right Moment — Schematic Plan
- Keeping Rooks on the Board to Avoid Pure Pawn Loss — Win/Draw Landmarks
- Keeping Rooks on the Board to Avoid Pure Pawn Loss — Conversion Technique
- Keeping Rooks on the Board to Avoid Pure Pawn Loss — Defensive Hold
- Keeping Rooks on the Board to Avoid Pure Pawn Loss — Common Blunders
- Keeping Rooks on the Board to Avoid Pure Pawn Loss — King Activation
- Keeping Rooks on the Board to Avoid Pure Pawn Loss — Tempo Counting
- Keeping Rooks on the Board to Avoid Pure Pawn Loss — Increment Execution
- Keeping Rooks on the Board to Avoid Pure Pawn Loss — Both-Sides AI Drill
- Keeping Rooks on the Board to Avoid Pure Pawn Loss — When to Trade
- Keeping Rooks on the Board to Avoid Pure Pawn Loss — Schematic Plan
- Liquidating into a Won King + Pawn Ending — Win/Draw Landmarks
- Liquidating into a Won King + Pawn Ending — Conversion Technique
- Liquidating into a Won King + Pawn Ending — Defensive Hold
- Liquidating into a Won King + Pawn Ending — Common Blunders
- Liquidating into a Won King + Pawn Ending — King Activation
- Liquidating into a Won King + Pawn Ending — Tempo Counting
- Liquidating into a Won King + Pawn Ending — Increment Execution
- Liquidating into a Won King + Pawn Ending — Both-Sides AI Drill
- Liquidating into a Won King + Pawn Ending — When to Trade
- Liquidating into a Won King + Pawn Ending — Schematic Plan
- Sacrificing the Exchange to Create Connected Passers — Win/Draw Landmarks
- Sacrificing the Exchange to Create Connected Passers — Conversion Technique
- Sacrificing the Exchange to Create Connected Passers — Defensive Hold
- Sacrificing the Exchange to Create Connected Passers — Common Blunders
- Sacrificing the Exchange to Create Connected Passers — King Activation
- Sacrificing the Exchange to Create Connected Passers — Tempo Counting
- Sacrificing the Exchange to Create Connected Passers — Increment Execution
- Sacrificing the Exchange to Create Connected Passers — Both-Sides AI Drill
- Sacrificing the Exchange to Create Connected Passers — When to Trade
- Sacrificing the Exchange to Create Connected Passers — Schematic Plan
- Giving Up a Pawn to Activate a Passive Rook — Win/Draw Landmarks
- Giving Up a Pawn to Activate a Passive Rook — Conversion Technique
- Giving Up a Pawn to Activate a Passive Rook — Defensive Hold
- Giving Up a Pawn to Activate a Passive Rook — Common Blunders
- Giving Up a Pawn to Activate a Passive Rook — King Activation
- Giving Up a Pawn to Activate a Passive Rook — Tempo Counting
- Giving Up a Pawn to Activate a Passive Rook — Increment Execution
- Giving Up a Pawn to Activate a Passive Rook — Both-Sides AI Drill
- Giving Up a Pawn to Activate a Passive Rook — When to Trade
- Giving Up a Pawn to Activate a Passive Rook — Schematic Plan
- Cutting Off the Enemy King Along a File — Win/Draw Landmarks
- Cutting Off the Enemy King Along a File — Conversion Technique
- Cutting Off the Enemy King Along a File — Defensive Hold
- Cutting Off the Enemy King Along a File — Common Blunders
- Cutting Off the Enemy King Along a File — King Activation
- Cutting Off the Enemy King Along a File — Tempo Counting
- Cutting Off the Enemy King Along a File — Increment Execution
- Cutting Off the Enemy King Along a File — Both-Sides AI Drill
- Cutting Off the Enemy King Along a File — When to Trade
- Cutting Off the Enemy King Along a File — Schematic Plan
- Cutting Off the Enemy King Along a Rank — Win/Draw Landmarks
- Cutting Off the Enemy King Along a Rank — Conversion Technique
- Cutting Off the Enemy King Along a Rank — Defensive Hold
- Cutting Off the Enemy King Along a Rank — Common Blunders
- Cutting Off the Enemy King Along a Rank — King Activation
- Cutting Off the Enemy King Along a Rank — Tempo Counting
- Cutting Off the Enemy King Along a Rank — Increment Execution
- Cutting Off the Enemy King Along a Rank — Both-Sides AI Drill
- Cutting Off the Enemy King Along a Rank — When to Trade
- Cutting Off the Enemy King Along a Rank — Schematic Plan
- Shouldering (Bodychecking) the Opposing King — Win/Draw Landmarks
- Shouldering (Bodychecking) the Opposing King — Conversion Technique
- Shouldering (Bodychecking) the Opposing King — Defensive Hold
- Shouldering (Bodychecking) the Opposing King — Common Blunders
- Shouldering (Bodychecking) the Opposing King — King Activation
- Shouldering (Bodychecking) the Opposing King — Tempo Counting
- Shouldering (Bodychecking) the Opposing King — Increment Execution
- Shouldering (Bodychecking) the Opposing King — Both-Sides AI Drill
- Shouldering (Bodychecking) the Opposing King — When to Trade
- Shouldering (Bodychecking) the Opposing King — Schematic Plan
- Corresponding Squares (Mined Squares) System — Win/Draw Landmarks
- Corresponding Squares (Mined Squares) System — Conversion Technique
- Corresponding Squares (Mined Squares) System — Defensive Hold
- Corresponding Squares (Mined Squares) System — Common Blunders
- Corresponding Squares (Mined Squares) System — King Activation
- Corresponding Squares (Mined Squares) System — Tempo Counting
- Corresponding Squares (Mined Squares) System — Increment Execution
- Corresponding Squares (Mined Squares) System — Both-Sides AI Drill
- Corresponding Squares (Mined Squares) System — When to Trade
- Corresponding Squares (Mined Squares) System — Schematic Plan
- Bähr's Rule for Rook + Blocked Pawn — Win/Draw Landmarks
- Bähr's Rule for Rook + Blocked Pawn — Conversion Technique
- Bähr's Rule for Rook + Blocked Pawn — Defensive Hold
- Bähr's Rule for Rook + Blocked Pawn — Common Blunders
- Bähr's Rule for Rook + Blocked Pawn — King Activation
- Bähr's Rule for Rook + Blocked Pawn — Tempo Counting
- Bähr's Rule for Rook + Blocked Pawn — Increment Execution
- Bähr's Rule for Rook + Blocked Pawn — Both-Sides AI Drill
- Bähr's Rule for Rook + Blocked Pawn — When to Trade
- Bähr's Rule for Rook + Blocked Pawn — Schematic Plan
- Fine's Basic Chess Endings Core Positions — Win/Draw Landmarks
- Fine's Basic Chess Endings Core Positions — Conversion Technique
- Fine's Basic Chess Endings Core Positions — Defensive Hold
- Fine's Basic Chess Endings Core Positions — Common Blunders
- Fine's Basic Chess Endings Core Positions — King Activation
- Fine's Basic Chess Endings Core Positions — Tempo Counting
- Fine's Basic Chess Endings Core Positions — Increment Execution
- Fine's Basic Chess Endings Core Positions — Both-Sides AI Drill
- Fine's Basic Chess Endings Core Positions — When to Trade
- Fine's Basic Chess Endings Core Positions — Schematic Plan
- Dvoretsky's Tragicomedies Blunder Patterns — Win/Draw Landmarks
- Dvoretsky's Tragicomedies Blunder Patterns — Conversion Technique
- Dvoretsky's Tragicomedies Blunder Patterns — Defensive Hold
- Dvoretsky's Tragicomedies Blunder Patterns — Common Blunders
- Dvoretsky's Tragicomedies Blunder Patterns — King Activation
- Dvoretsky's Tragicomedies Blunder Patterns — Tempo Counting
- Dvoretsky's Tragicomedies Blunder Patterns — Increment Execution
- Dvoretsky's Tragicomedies Blunder Patterns — Both-Sides AI Drill
- Dvoretsky's Tragicomedies Blunder Patterns — When to Trade
- Dvoretsky's Tragicomedies Blunder Patterns — Schematic Plan
- Silman's Rating-Scoped Endgame Milestones — Win/Draw Landmarks
- Silman's Rating-Scoped Endgame Milestones — Conversion Technique
- Silman's Rating-Scoped Endgame Milestones — Defensive Hold
- Silman's Rating-Scoped Endgame Milestones — Common Blunders
- Silman's Rating-Scoped Endgame Milestones — King Activation
- Silman's Rating-Scoped Endgame Milestones — Tempo Counting
- Silman's Rating-Scoped Endgame Milestones — Increment Execution
- Silman's Rating-Scoped Endgame Milestones — Both-Sides AI Drill
- Silman's Rating-Scoped Endgame Milestones — When to Trade
- Silman's Rating-Scoped Endgame Milestones — Schematic Plan
- De la Villa's 100 Endgames Core Tenets — Win/Draw Landmarks
- De la Villa's 100 Endgames Core Tenets — Conversion Technique
- De la Villa's 100 Endgames Core Tenets — Defensive Hold
- De la Villa's 100 Endgames Core Tenets — Common Blunders
- De la Villa's 100 Endgames Core Tenets — King Activation
- De la Villa's 100 Endgames Core Tenets — Tempo Counting
- De la Villa's 100 Endgames Core Tenets — Increment Execution
- De la Villa's 100 Endgames Core Tenets — Both-Sides AI Drill
- De la Villa's 100 Endgames Core Tenets — When to Trade
- De la Villa's 100 Endgames Core Tenets — Schematic Plan
- Van Perlo's Tactical Endgame Tricks — Win/Draw Landmarks
- Van Perlo's Tactical Endgame Tricks — Conversion Technique
- Van Perlo's Tactical Endgame Tricks — Defensive Hold
- Van Perlo's Tactical Endgame Tricks — Common Blunders
- Van Perlo's Tactical Endgame Tricks — King Activation
- Van Perlo's Tactical Endgame Tricks — Tempo Counting
- Van Perlo's Tactical Endgame Tricks — Increment Execution
- Van Perlo's Tactical Endgame Tricks — Both-Sides AI Drill
- Van Perlo's Tactical Endgame Tricks — When to Trade
- Van Perlo's Tactical Endgame Tricks — Schematic Plan
- Shereshevsky's Do Not Rush Principle — Win/Draw Landmarks
- Shereshevsky's Do Not Rush Principle — Conversion Technique
- Shereshevsky's Do Not Rush Principle — Defensive Hold
- Shereshevsky's Do Not Rush Principle — Common Blunders
- Shereshevsky's Do Not Rush Principle — King Activation
- Shereshevsky's Do Not Rush Principle — Tempo Counting
- Shereshevsky's Do Not Rush Principle — Increment Execution
- Shereshevsky's Do Not Rush Principle — Both-Sides AI Drill
- Shereshevsky's Do Not Rush Principle — When to Trade
- Shereshevsky's Do Not Rush Principle — Schematic Plan
- Fixing Opponent Pawns on Your Bishop's Color — Win/Draw Landmarks
- Fixing Opponent Pawns on Your Bishop's Color — Conversion Technique
- Fixing Opponent Pawns on Your Bishop's Color — Defensive Hold
- Fixing Opponent Pawns on Your Bishop's Color — Common Blunders
- Fixing Opponent Pawns on Your Bishop's Color — King Activation
- Fixing Opponent Pawns on Your Bishop's Color — Tempo Counting
- Fixing Opponent Pawns on Your Bishop's Color — Increment Execution
- Fixing Opponent Pawns on Your Bishop's Color — Both-Sides AI Drill
- Fixing Opponent Pawns on Your Bishop's Color — When to Trade
- Fixing Opponent Pawns on Your Bishop's Color — Schematic Plan
- Creating an Outside Passed Pawn Decoy — Win/Draw Landmarks
- Creating an Outside Passed Pawn Decoy — Conversion Technique
- Creating an Outside Passed Pawn Decoy — Defensive Hold
- Creating an Outside Passed Pawn Decoy — Common Blunders
- Creating an Outside Passed Pawn Decoy — King Activation
- Creating an Outside Passed Pawn Decoy — Tempo Counting
- Creating an Outside Passed Pawn Decoy — Increment Execution
- Creating an Outside Passed Pawn Decoy — Both-Sides AI Drill
- Creating an Outside Passed Pawn Decoy — When to Trade
- Creating an Outside Passed Pawn Decoy — Schematic Plan
- Blockading a Passed Pawn with the Knight — Win/Draw Landmarks
- Blockading a Passed Pawn with the Knight — Conversion Technique
- Blockading a Passed Pawn with the Knight — Defensive Hold
- Blockading a Passed Pawn with the Knight — Common Blunders
- Blockading a Passed Pawn with the Knight — King Activation
- Blockading a Passed Pawn with the Knight — Tempo Counting
- Blockading a Passed Pawn with the Knight — Increment Execution
- Blockading a Passed Pawn with the Knight — Both-Sides AI Drill
- Blockading a Passed Pawn with the Knight — When to Trade
- Blockading a Passed Pawn with the Knight — Schematic Plan
- Blockading with the King in Pure Endgames — Win/Draw Landmarks
- Blockading with the King in Pure Endgames — Conversion Technique
- Blockading with the King in Pure Endgames — Defensive Hold
- Blockading with the King in Pure Endgames — Common Blunders
- Blockading with the King in Pure Endgames — King Activation
- Blockading with the King in Pure Endgames — Tempo Counting
- Blockading with the King in Pure Endgames — Increment Execution
- Blockading with the King in Pure Endgames — Both-Sides AI Drill
- Blockading with the King in Pure Endgames — When to Trade
- Blockading with the King in Pure Endgames — Schematic Plan
- Using the King as an Attacking Piece — Win/Draw Landmarks
- Using the King as an Attacking Piece — Conversion Technique
- Using the King as an Attacking Piece — Defensive Hold
- Using the King as an Attacking Piece — Common Blunders
- Using the King as an Attacking Piece — King Activation
- Using the King as an Attacking Piece — Tempo Counting
- Using the King as an Attacking Piece — Increment Execution
- Using the King as an Attacking Piece — Both-Sides AI Drill
- Using the King as an Attacking Piece — When to Trade
- Using the King as an Attacking Piece — Schematic Plan
- Overloading the Defending King — Win/Draw Landmarks
- Overloading the Defending King — Conversion Technique
- Overloading the Defending King — Defensive Hold
- Overloading the Defending King — Common Blunders
- Overloading the Defending King — King Activation
- Overloading the Defending King — Tempo Counting
- Overloading the Defending King — Increment Execution
- Overloading the Defending King — Both-Sides AI Drill
- Overloading the Defending King — When to Trade
- Overloading the Defending King — Schematic Plan
- Breaking a Symmetrical Pawn Structure — Win/Draw Landmarks
- Breaking a Symmetrical Pawn Structure — Conversion Technique
- Breaking a Symmetrical Pawn Structure — Defensive Hold
- Breaking a Symmetrical Pawn Structure — Common Blunders
- Breaking a Symmetrical Pawn Structure — King Activation
- Breaking a Symmetrical Pawn Structure — Tempo Counting
- Breaking a Symmetrical Pawn Structure — Increment Execution
- Breaking a Symmetrical Pawn Structure — Both-Sides AI Drill
- Breaking a Symmetrical Pawn Structure — When to Trade
- Breaking a Symmetrical Pawn Structure — Schematic Plan
- Avoiding Premature Pawn Advances — Win/Draw Landmarks
- Avoiding Premature Pawn Advances — Conversion Technique
- Avoiding Premature Pawn Advances — Defensive Hold
- Avoiding Premature Pawn Advances — Common Blunders
- Avoiding Premature Pawn Advances — King Activation
- Avoiding Premature Pawn Advances — Tempo Counting
- Avoiding Premature Pawn Advances — Increment Execution
- Avoiding Premature Pawn Advances — Both-Sides AI Drill
- Avoiding Premature Pawn Advances — When to Trade
- Avoiding Premature Pawn Advances — Schematic Plan
- Triangulation in Bishop Endings — Win/Draw Landmarks
- Triangulation in Bishop Endings — Conversion Technique
- Triangulation in Bishop Endings — Defensive Hold
- Triangulation in Bishop Endings — Common Blunders
- Triangulation in Bishop Endings — King Activation
- Triangulation in Bishop Endings — Tempo Counting
- Triangulation in Bishop Endings — Increment Execution
- Triangulation in Bishop Endings — Both-Sides AI Drill
- Triangulation in Bishop Endings — When to Trade
- Triangulation in Bishop Endings — Schematic Plan
- Knight Perimter Barriers (3x3 Square Net) — Win/Draw Landmarks
- Knight Perimter Barriers (3x3 Square Net) — Conversion Technique
- Knight Perimter Barriers (3x3 Square Net) — Defensive Hold
- Knight Perimter Barriers (3x3 Square Net) — Common Blunders
- Knight Perimter Barriers (3x3 Square Net) — King Activation
- Knight Perimter Barriers (3x3 Square Net) — Tempo Counting
- Knight Perimter Barriers (3x3 Square Net) — Increment Execution
- Knight Perimter Barriers (3x3 Square Net) — Both-Sides AI Drill
- Knight Perimter Barriers (3x3 Square Net) — When to Trade
- Knight Perimter Barriers (3x3 Square Net) — Schematic Plan
- Rook Behind Opponent's Passed Pawn — Win/Draw Landmarks
- Rook Behind Opponent's Passed Pawn — Conversion Technique
- Rook Behind Opponent's Passed Pawn — Defensive Hold
- Rook Behind Opponent's Passed Pawn — Common Blunders
- Rook Behind Opponent's Passed Pawn — King Activation
- Rook Behind Opponent's Passed Pawn — Tempo Counting
- Rook Behind Opponent's Passed Pawn — Increment Execution
- Rook Behind Opponent's Passed Pawn — Both-Sides AI Drill
- Rook Behind Opponent's Passed Pawn — When to Trade
- Rook Behind Opponent's Passed Pawn — Schematic Plan
- Frontal Rook Attacks on Isolated Pawns — Win/Draw Landmarks
- Frontal Rook Attacks on Isolated Pawns — Conversion Technique
- Frontal Rook Attacks on Isolated Pawns — Defensive Hold
- Frontal Rook Attacks on Isolated Pawns — Common Blunders
- Frontal Rook Attacks on Isolated Pawns — King Activation
- Frontal Rook Attacks on Isolated Pawns — Tempo Counting
- Frontal Rook Attacks on Isolated Pawns — Increment Execution
- Frontal Rook Attacks on Isolated Pawns — Both-Sides AI Drill
- Frontal Rook Attacks on Isolated Pawns — When to Trade
- Frontal Rook Attacks on Isolated Pawns — Schematic Plan
- Side Checks Distance Rule (3+ Files) — Win/Draw Landmarks
- Side Checks Distance Rule (3+ Files) — Conversion Technique
- Side Checks Distance Rule (3+ Files) — Defensive Hold
- Side Checks Distance Rule (3+ Files) — Common Blunders
- Side Checks Distance Rule (3+ Files) — King Activation
- Side Checks Distance Rule (3+ Files) — Tempo Counting
- Side Checks Distance Rule (3+ Files) — Increment Execution
- Side Checks Distance Rule (3+ Files) — Both-Sides AI Drill
- Side Checks Distance Rule (3+ Files) — When to Trade
- Side Checks Distance Rule (3+ Files) — Schematic Plan
- Umbrella Pawn Shield Against Vertical Checks — Win/Draw Landmarks
- Umbrella Pawn Shield Against Vertical Checks — Conversion Technique
- Umbrella Pawn Shield Against Vertical Checks — Defensive Hold
- Umbrella Pawn Shield Against Vertical Checks — Common Blunders
- Umbrella Pawn Shield Against Vertical Checks — King Activation
- Umbrella Pawn Shield Against Vertical Checks — Tempo Counting
- Umbrella Pawn Shield Against Vertical Checks — Increment Execution
- Umbrella Pawn Shield Against Vertical Checks — Both-Sides AI Drill
- Umbrella Pawn Shield Against Vertical Checks — When to Trade
- Umbrella Pawn Shield Against Vertical Checks — Schematic Plan
- Transitioning from Middlegame Attack to Endgame Technique — Win/Draw Landmarks
- Transitioning from Middlegame Attack to Endgame Technique — Conversion Technique
- Transitioning from Middlegame Attack to Endgame Technique — Defensive Hold
- Transitioning from Middlegame Attack to Endgame Technique — Common Blunders
- Transitioning from Middlegame Attack to Endgame Technique — King Activation
- Transitioning from Middlegame Attack to Endgame Technique — Tempo Counting
- Transitioning from Middlegame Attack to Endgame Technique — Increment Execution
- Transitioning from Middlegame Attack to Endgame Technique — Both-Sides AI Drill
- Transitioning from Middlegame Attack to Endgame Technique — When to Trade
- Transitioning from Middlegame Attack to Endgame Technique — Schematic Plan
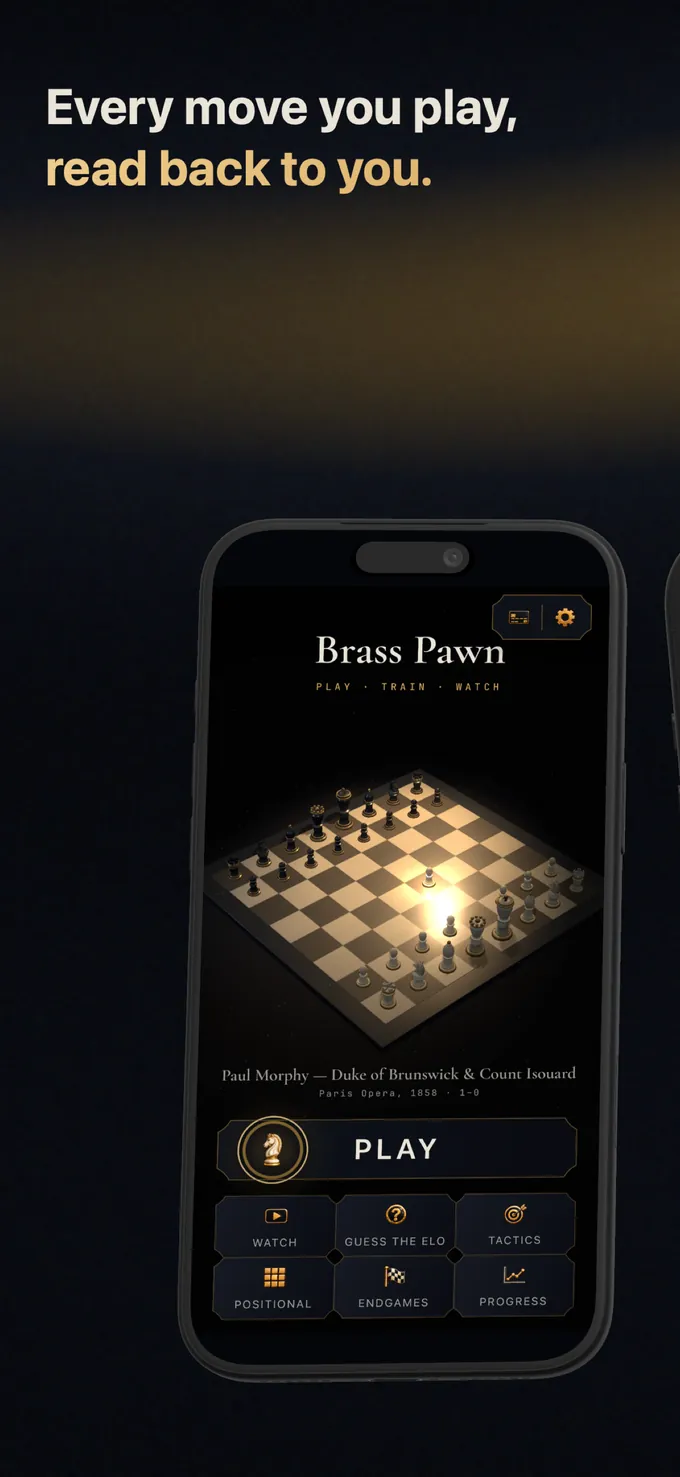
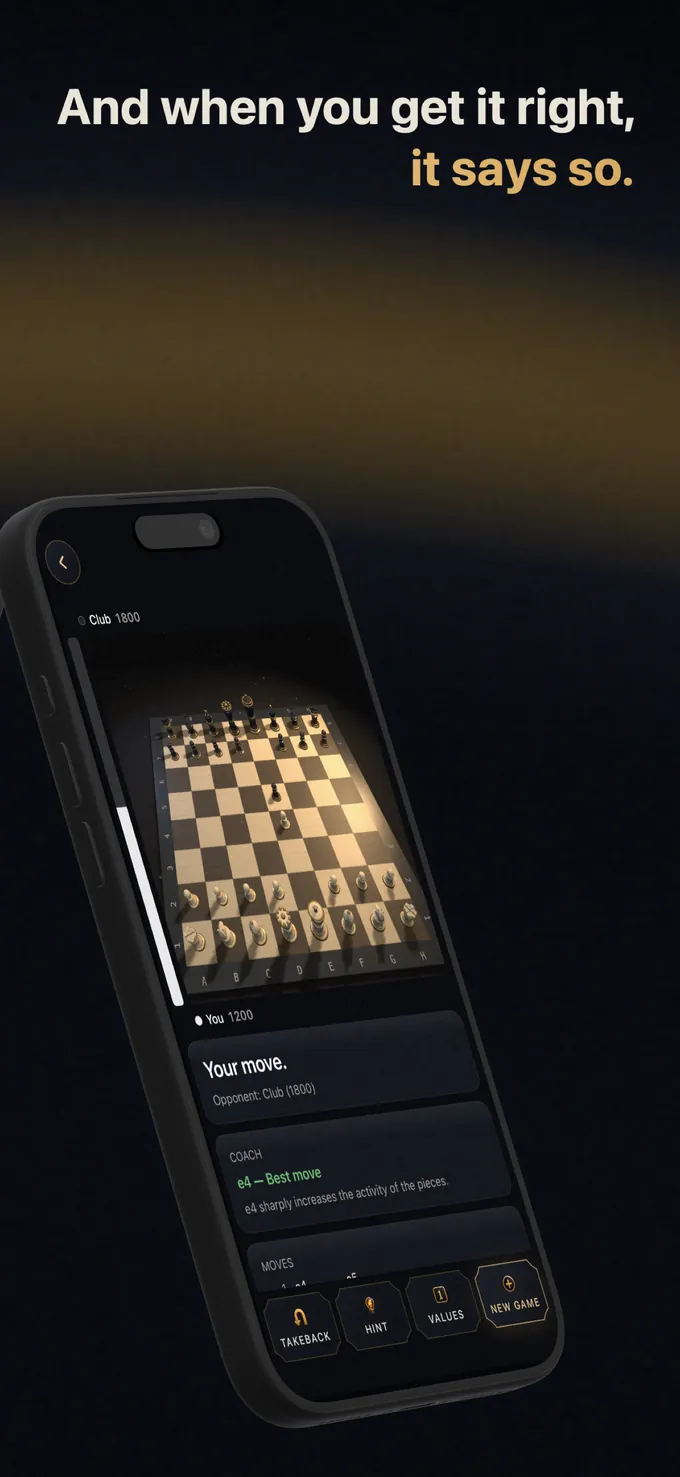
Brass Pawn Training Interface on iOS
Frequently Asked Questions
Which endgames should I learn first?
Start with King + Pawn opposition and key squares, followed by the Lucena and Philidor rook positions.