Chess Tactical Motifs & Combinational Calculation Hub
Master 110 tactical and checkmating motifs across 10 structured calculation and blunder-prevention protocols.
- Absolute Pin Along a File — CCT Scan Protocol
- Absolute Pin Along a File — Blunder Prevention
- Absolute Pin Along a File — Visualization Tree
- Absolute Pin Along a File — Move-Order Inversion
- Absolute Pin Along a File — Defensive Only-Moves
- Absolute Pin Along a File — Blitz Pattern Reflex
- Absolute Pin Along a File — Coached Mode Drill
- Absolute Pin Along a File — Engine Sparring
- Absolute Pin Along a File — Coordinate Chunking
- Absolute Pin Along a File — Mistake Retry Loop
- Absolute Pin Along a Diagonal — CCT Scan Protocol
- Absolute Pin Along a Diagonal — Blunder Prevention
- Absolute Pin Along a Diagonal — Visualization Tree
- Absolute Pin Along a Diagonal — Move-Order Inversion
- Absolute Pin Along a Diagonal — Defensive Only-Moves
- Absolute Pin Along a Diagonal — Blitz Pattern Reflex
- Absolute Pin Along a Diagonal — Coached Mode Drill
- Absolute Pin Along a Diagonal — Engine Sparring
- Absolute Pin Along a Diagonal — Coordinate Chunking
- Absolute Pin Along a Diagonal — Mistake Retry Loop
- Relative Pin on the Queen — CCT Scan Protocol
- Relative Pin on the Queen — Blunder Prevention
- Relative Pin on the Queen — Visualization Tree
- Relative Pin on the Queen — Move-Order Inversion
- Relative Pin on the Queen — Defensive Only-Moves
- Relative Pin on the Queen — Blitz Pattern Reflex
- Relative Pin on the Queen — Coached Mode Drill
- Relative Pin on the Queen — Engine Sparring
- Relative Pin on the Queen — Coordinate Chunking
- Relative Pin on the Queen — Mistake Retry Loop
- Cross-Pin Geometry — CCT Scan Protocol
- Cross-Pin Geometry — Blunder Prevention
- Cross-Pin Geometry — Visualization Tree
- Cross-Pin Geometry — Move-Order Inversion
- Cross-Pin Geometry — Defensive Only-Moves
- Cross-Pin Geometry — Blitz Pattern Reflex
- Cross-Pin Geometry — Coached Mode Drill
- Cross-Pin Geometry — Engine Sparring
- Cross-Pin Geometry — Coordinate Chunking
- Cross-Pin Geometry — Mistake Retry Loop
- Unpinning with Tempo — CCT Scan Protocol
- Unpinning with Tempo — Blunder Prevention
- Unpinning with Tempo — Visualization Tree
- Unpinning with Tempo — Move-Order Inversion
- Unpinning with Tempo — Defensive Only-Moves
- Unpinning with Tempo — Blitz Pattern Reflex
- Unpinning with Tempo — Coached Mode Drill
- Unpinning with Tempo — Engine Sparring
- Unpinning with Tempo — Coordinate Chunking
- Unpinning with Tempo — Mistake Retry Loop
- Knight Fork (Royal Family Fork) — CCT Scan Protocol
- Knight Fork (Royal Family Fork) — Blunder Prevention
- Knight Fork (Royal Family Fork) — Visualization Tree
- Knight Fork (Royal Family Fork) — Move-Order Inversion
- Knight Fork (Royal Family Fork) — Defensive Only-Moves
- Knight Fork (Royal Family Fork) — Blitz Pattern Reflex
- Knight Fork (Royal Family Fork) — Coached Mode Drill
- Knight Fork (Royal Family Fork) — Engine Sparring
- Knight Fork (Royal Family Fork) — Coordinate Chunking
- Knight Fork (Royal Family Fork) — Mistake Retry Loop
- Pawn Fork in the Center — CCT Scan Protocol
- Pawn Fork in the Center — Blunder Prevention
- Pawn Fork in the Center — Visualization Tree
- Pawn Fork in the Center — Move-Order Inversion
- Pawn Fork in the Center — Defensive Only-Moves
- Pawn Fork in the Center — Blitz Pattern Reflex
- Pawn Fork in the Center — Coached Mode Drill
- Pawn Fork in the Center — Engine Sparring
- Pawn Fork in the Center — Coordinate Chunking
- Pawn Fork in the Center — Mistake Retry Loop
- Bishop Double Attack — CCT Scan Protocol
- Bishop Double Attack — Blunder Prevention
- Bishop Double Attack — Visualization Tree
- Bishop Double Attack — Move-Order Inversion
- Bishop Double Attack — Defensive Only-Moves
- Bishop Double Attack — Blitz Pattern Reflex
- Bishop Double Attack — Coached Mode Drill
- Bishop Double Attack — Engine Sparring
- Bishop Double Attack — Coordinate Chunking
- Bishop Double Attack — Mistake Retry Loop
- Rook Skewer on the 7th Rank — CCT Scan Protocol
- Rook Skewer on the 7th Rank — Blunder Prevention
- Rook Skewer on the 7th Rank — Visualization Tree
- Rook Skewer on the 7th Rank — Move-Order Inversion
- Rook Skewer on the 7th Rank — Defensive Only-Moves
- Rook Skewer on the 7th Rank — Blitz Pattern Reflex
- Rook Skewer on the 7th Rank — Coached Mode Drill
- Rook Skewer on the 7th Rank — Engine Sparring
- Rook Skewer on the 7th Rank — Coordinate Chunking
- Rook Skewer on the 7th Rank — Mistake Retry Loop
- Diagonal Queen-Bishop Battery — CCT Scan Protocol
- Diagonal Queen-Bishop Battery — Blunder Prevention
- Diagonal Queen-Bishop Battery — Visualization Tree
- Diagonal Queen-Bishop Battery — Move-Order Inversion
- Diagonal Queen-Bishop Battery — Defensive Only-Moves
- Diagonal Queen-Bishop Battery — Blitz Pattern Reflex
- Diagonal Queen-Bishop Battery — Coached Mode Drill
- Diagonal Queen-Bishop Battery — Engine Sparring
- Diagonal Queen-Bishop Battery — Coordinate Chunking
- Diagonal Queen-Bishop Battery — Mistake Retry Loop
- Alekhine's Gun (Double Rooks + Queen) — CCT Scan Protocol
- Alekhine's Gun (Double Rooks + Queen) — Blunder Prevention
- Alekhine's Gun (Double Rooks + Queen) — Visualization Tree
- Alekhine's Gun (Double Rooks + Queen) — Move-Order Inversion
- Alekhine's Gun (Double Rooks + Queen) — Defensive Only-Moves
- Alekhine's Gun (Double Rooks + Queen) — Blitz Pattern Reflex
- Alekhine's Gun (Double Rooks + Queen) — Coached Mode Drill
- Alekhine's Gun (Double Rooks + Queen) — Engine Sparring
- Alekhine's Gun (Double Rooks + Queen) — Coordinate Chunking
- Alekhine's Gun (Double Rooks + Queen) — Mistake Retry Loop
- Discovered Attack with Check — CCT Scan Protocol
- Discovered Attack with Check — Blunder Prevention
- Discovered Attack with Check — Visualization Tree
- Discovered Attack with Check — Move-Order Inversion
- Discovered Attack with Check — Defensive Only-Moves
- Discovered Attack with Check — Blitz Pattern Reflex
- Discovered Attack with Check — Coached Mode Drill
- Discovered Attack with Check — Engine Sparring
- Discovered Attack with Check — Coordinate Chunking
- Discovered Attack with Check — Mistake Retry Loop
- Double Check King Hunt — CCT Scan Protocol
- Double Check King Hunt — Blunder Prevention
- Double Check King Hunt — Visualization Tree
- Double Check King Hunt — Move-Order Inversion
- Double Check King Hunt — Defensive Only-Moves
- Double Check King Hunt — Blitz Pattern Reflex
- Double Check King Hunt — Coached Mode Drill
- Double Check King Hunt — Engine Sparring
- Double Check King Hunt — Coordinate Chunking
- Double Check King Hunt — Mistake Retry Loop
- Windmill (Torre-Lasker) Combination — CCT Scan Protocol
- Windmill (Torre-Lasker) Combination — Blunder Prevention
- Windmill (Torre-Lasker) Combination — Visualization Tree
- Windmill (Torre-Lasker) Combination — Move-Order Inversion
- Windmill (Torre-Lasker) Combination — Defensive Only-Moves
- Windmill (Torre-Lasker) Combination — Blitz Pattern Reflex
- Windmill (Torre-Lasker) Combination — Coached Mode Drill
- Windmill (Torre-Lasker) Combination — Engine Sparring
- Windmill (Torre-Lasker) Combination — Coordinate Chunking
- Windmill (Torre-Lasker) Combination — Mistake Retry Loop
- Deflection of the Overloaded Defender — CCT Scan Protocol
- Deflection of the Overloaded Defender — Blunder Prevention
- Deflection of the Overloaded Defender — Visualization Tree
- Deflection of the Overloaded Defender — Move-Order Inversion
- Deflection of the Overloaded Defender — Defensive Only-Moves
- Deflection of the Overloaded Defender — Blitz Pattern Reflex
- Deflection of the Overloaded Defender — Coached Mode Drill
- Deflection of the Overloaded Defender — Engine Sparring
- Deflection of the Overloaded Defender — Coordinate Chunking
- Deflection of the Overloaded Defender — Mistake Retry Loop
- Decoy Sacrifice onto a Mating Square — CCT Scan Protocol
- Decoy Sacrifice onto a Mating Square — Blunder Prevention
- Decoy Sacrifice onto a Mating Square — Visualization Tree
- Decoy Sacrifice onto a Mating Square — Move-Order Inversion
- Decoy Sacrifice onto a Mating Square — Defensive Only-Moves
- Decoy Sacrifice onto a Mating Square — Blitz Pattern Reflex
- Decoy Sacrifice onto a Mating Square — Coached Mode Drill
- Decoy Sacrifice onto a Mating Square — Engine Sparring
- Decoy Sacrifice onto a Mating Square — Coordinate Chunking
- Decoy Sacrifice onto a Mating Square — Mistake Retry Loop
- Interference Between Connected Rooks — CCT Scan Protocol
- Interference Between Connected Rooks — Blunder Prevention
- Interference Between Connected Rooks — Visualization Tree
- Interference Between Connected Rooks — Move-Order Inversion
- Interference Between Connected Rooks — Defensive Only-Moves
- Interference Between Connected Rooks — Blitz Pattern Reflex
- Interference Between Connected Rooks — Coached Mode Drill
- Interference Between Connected Rooks — Engine Sparring
- Interference Between Connected Rooks — Coordinate Chunking
- Interference Between Connected Rooks — Mistake Retry Loop
- Novotny Theme (Rook & Bishop Intersection) — CCT Scan Protocol
- Novotny Theme (Rook & Bishop Intersection) — Blunder Prevention
- Novotny Theme (Rook & Bishop Intersection) — Visualization Tree
- Novotny Theme (Rook & Bishop Intersection) — Move-Order Inversion
- Novotny Theme (Rook & Bishop Intersection) — Defensive Only-Moves
- Novotny Theme (Rook & Bishop Intersection) — Blitz Pattern Reflex
- Novotny Theme (Rook & Bishop Intersection) — Coached Mode Drill
- Novotny Theme (Rook & Bishop Intersection) — Engine Sparring
- Novotny Theme (Rook & Bishop Intersection) — Coordinate Chunking
- Novotny Theme (Rook & Bishop Intersection) — Mistake Retry Loop
- Grimshaw Mutual Interference — CCT Scan Protocol
- Grimshaw Mutual Interference — Blunder Prevention
- Grimshaw Mutual Interference — Visualization Tree
- Grimshaw Mutual Interference — Move-Order Inversion
- Grimshaw Mutual Interference — Defensive Only-Moves
- Grimshaw Mutual Interference — Blitz Pattern Reflex
- Grimshaw Mutual Interference — Coached Mode Drill
- Grimshaw Mutual Interference — Engine Sparring
- Grimshaw Mutual Interference — Coordinate Chunking
- Grimshaw Mutual Interference — Mistake Retry Loop
- Plachutta Rook Interference — CCT Scan Protocol
- Plachutta Rook Interference — Blunder Prevention
- Plachutta Rook Interference — Visualization Tree
- Plachutta Rook Interference — Move-Order Inversion
- Plachutta Rook Interference — Defensive Only-Moves
- Plachutta Rook Interference — Blitz Pattern Reflex
- Plachutta Rook Interference — Coached Mode Drill
- Plachutta Rook Interference — Engine Sparring
- Plachutta Rook Interference — Coordinate Chunking
- Plachutta Rook Interference — Mistake Retry Loop
- Clearance Sacrifice (Vacating a Square) — CCT Scan Protocol
- Clearance Sacrifice (Vacating a Square) — Blunder Prevention
- Clearance Sacrifice (Vacating a Square) — Visualization Tree
- Clearance Sacrifice (Vacating a Square) — Move-Order Inversion
- Clearance Sacrifice (Vacating a Square) — Defensive Only-Moves
- Clearance Sacrifice (Vacating a Square) — Blitz Pattern Reflex
- Clearance Sacrifice (Vacating a Square) — Coached Mode Drill
- Clearance Sacrifice (Vacating a Square) — Engine Sparring
- Clearance Sacrifice (Vacating a Square) — Coordinate Chunking
- Clearance Sacrifice (Vacating a Square) — Mistake Retry Loop
- Line-Opening Pawn Breakthrough — CCT Scan Protocol
- Line-Opening Pawn Breakthrough — Blunder Prevention
- Line-Opening Pawn Breakthrough — Visualization Tree
- Line-Opening Pawn Breakthrough — Move-Order Inversion
- Line-Opening Pawn Breakthrough — Defensive Only-Moves
- Line-Opening Pawn Breakthrough — Blitz Pattern Reflex
- Line-Opening Pawn Breakthrough — Coached Mode Drill
- Line-Opening Pawn Breakthrough — Engine Sparring
- Line-Opening Pawn Breakthrough — Coordinate Chunking
- Line-Opening Pawn Breakthrough — Mistake Retry Loop
- Zwischenzug (In-Between Check) — CCT Scan Protocol
- Zwischenzug (In-Between Check) — Blunder Prevention
- Zwischenzug (In-Between Check) — Visualization Tree
- Zwischenzug (In-Between Check) — Move-Order Inversion
- Zwischenzug (In-Between Check) — Defensive Only-Moves
- Zwischenzug (In-Between Check) — Blitz Pattern Reflex
- Zwischenzug (In-Between Check) — Coached Mode Drill
- Zwischenzug (In-Between Check) — Engine Sparring
- Zwischenzug (In-Between Check) — Coordinate Chunking
- Zwischenzug (In-Between Check) — Mistake Retry Loop
- Zwischenschach Tempo Gain — CCT Scan Protocol
- Zwischenschach Tempo Gain — Blunder Prevention
- Zwischenschach Tempo Gain — Visualization Tree
- Zwischenschach Tempo Gain — Move-Order Inversion
- Zwischenschach Tempo Gain — Defensive Only-Moves
- Zwischenschach Tempo Gain — Blitz Pattern Reflex
- Zwischenschach Tempo Gain — Coached Mode Drill
- Zwischenschach Tempo Gain — Engine Sparring
- Zwischenschach Tempo Gain — Coordinate Chunking
- Zwischenschach Tempo Gain — Mistake Retry Loop
- Desperado Piece Sacrifice — CCT Scan Protocol
- Desperado Piece Sacrifice — Blunder Prevention
- Desperado Piece Sacrifice — Visualization Tree
- Desperado Piece Sacrifice — Move-Order Inversion
- Desperado Piece Sacrifice — Defensive Only-Moves
- Desperado Piece Sacrifice — Blitz Pattern Reflex
- Desperado Piece Sacrifice — Coached Mode Drill
- Desperado Piece Sacrifice — Engine Sparring
- Desperado Piece Sacrifice — Coordinate Chunking
- Desperado Piece Sacrifice — Mistake Retry Loop
- Zugzwang in Tactical Middlegames — CCT Scan Protocol
- Zugzwang in Tactical Middlegames — Blunder Prevention
- Zugzwang in Tactical Middlegames — Visualization Tree
- Zugzwang in Tactical Middlegames — Move-Order Inversion
- Zugzwang in Tactical Middlegames — Defensive Only-Moves
- Zugzwang in Tactical Middlegames — Blitz Pattern Reflex
- Zugzwang in Tactical Middlegames — Coached Mode Drill
- Zugzwang in Tactical Middlegames — Engine Sparring
- Zugzwang in Tactical Middlegames — Coordinate Chunking
- Zugzwang in Tactical Middlegames — Mistake Retry Loop
- X-Ray Attack Through an Enemy Piece — CCT Scan Protocol
- X-Ray Attack Through an Enemy Piece — Blunder Prevention
- X-Ray Attack Through an Enemy Piece — Visualization Tree
- X-Ray Attack Through an Enemy Piece — Move-Order Inversion
- X-Ray Attack Through an Enemy Piece — Defensive Only-Moves
- X-Ray Attack Through an Enemy Piece — Blitz Pattern Reflex
- X-Ray Attack Through an Enemy Piece — Coached Mode Drill
- X-Ray Attack Through an Enemy Piece — Engine Sparring
- X-Ray Attack Through an Enemy Piece — Coordinate Chunking
- X-Ray Attack Through an Enemy Piece — Mistake Retry Loop
- Underpromotion to a Knight with Check — CCT Scan Protocol
- Underpromotion to a Knight with Check — Blunder Prevention
- Underpromotion to a Knight with Check — Visualization Tree
- Underpromotion to a Knight with Check — Move-Order Inversion
- Underpromotion to a Knight with Check — Defensive Only-Moves
- Underpromotion to a Knight with Check — Blitz Pattern Reflex
- Underpromotion to a Knight with Check — Coached Mode Drill
- Underpromotion to a Knight with Check — Engine Sparring
- Underpromotion to a Knight with Check — Coordinate Chunking
- Underpromotion to a Knight with Check — Mistake Retry Loop
- Underpromotion to Rook to Avoid Stalemate — CCT Scan Protocol
- Underpromotion to Rook to Avoid Stalemate — Blunder Prevention
- Underpromotion to Rook to Avoid Stalemate — Visualization Tree
- Underpromotion to Rook to Avoid Stalemate — Move-Order Inversion
- Underpromotion to Rook to Avoid Stalemate — Defensive Only-Moves
- Underpromotion to Rook to Avoid Stalemate — Blitz Pattern Reflex
- Underpromotion to Rook to Avoid Stalemate — Coached Mode Drill
- Underpromotion to Rook to Avoid Stalemate — Engine Sparring
- Underpromotion to Rook to Avoid Stalemate — Coordinate Chunking
- Underpromotion to Rook to Avoid Stalemate — Mistake Retry Loop
- Stalemate Swindle Resource — CCT Scan Protocol
- Stalemate Swindle Resource — Blunder Prevention
- Stalemate Swindle Resource — Visualization Tree
- Stalemate Swindle Resource — Move-Order Inversion
- Stalemate Swindle Resource — Defensive Only-Moves
- Stalemate Swindle Resource — Blitz Pattern Reflex
- Stalemate Swindle Resource — Coached Mode Drill
- Stalemate Swindle Resource — Engine Sparring
- Stalemate Swindle Resource — Coordinate Chunking
- Stalemate Swindle Resource — Mistake Retry Loop
- Perpetual Check Escape Pattern — CCT Scan Protocol
- Perpetual Check Escape Pattern — Blunder Prevention
- Perpetual Check Escape Pattern — Visualization Tree
- Perpetual Check Escape Pattern — Move-Order Inversion
- Perpetual Check Escape Pattern — Defensive Only-Moves
- Perpetual Check Escape Pattern — Blitz Pattern Reflex
- Perpetual Check Escape Pattern — Coached Mode Drill
- Perpetual Check Escape Pattern — Engine Sparring
- Perpetual Check Escape Pattern — Coordinate Chunking
- Perpetual Check Escape Pattern — Mistake Retry Loop
- Greek Gift Sacrifice (Bxh7+ Ng5+ Qh5) — CCT Scan Protocol
- Greek Gift Sacrifice (Bxh7+ Ng5+ Qh5) — Blunder Prevention
- Greek Gift Sacrifice (Bxh7+ Ng5+ Qh5) — Visualization Tree
- Greek Gift Sacrifice (Bxh7+ Ng5+ Qh5) — Move-Order Inversion
- Greek Gift Sacrifice (Bxh7+ Ng5+ Qh5) — Defensive Only-Moves
- Greek Gift Sacrifice (Bxh7+ Ng5+ Qh5) — Blitz Pattern Reflex
- Greek Gift Sacrifice (Bxh7+ Ng5+ Qh5) — Coached Mode Drill
- Greek Gift Sacrifice (Bxh7+ Ng5+ Qh5) — Engine Sparring
- Greek Gift Sacrifice (Bxh7+ Ng5+ Qh5) — Coordinate Chunking
- Greek Gift Sacrifice (Bxh7+ Ng5+ Qh5) — Mistake Retry Loop
- Double Bishop Sacrifice (Lasker Bxf7+/Bxg7) — CCT Scan Protocol
- Double Bishop Sacrifice (Lasker Bxf7+/Bxg7) — Blunder Prevention
- Double Bishop Sacrifice (Lasker Bxf7+/Bxg7) — Visualization Tree
- Double Bishop Sacrifice (Lasker Bxf7+/Bxg7) — Move-Order Inversion
- Double Bishop Sacrifice (Lasker Bxf7+/Bxg7) — Defensive Only-Moves
- Double Bishop Sacrifice (Lasker Bxf7+/Bxg7) — Blitz Pattern Reflex
- Double Bishop Sacrifice (Lasker Bxf7+/Bxg7) — Coached Mode Drill
- Double Bishop Sacrifice (Lasker Bxf7+/Bxg7) — Engine Sparring
- Double Bishop Sacrifice (Lasker Bxf7+/Bxg7) — Coordinate Chunking
- Double Bishop Sacrifice (Lasker Bxf7+/Bxg7) — Mistake Retry Loop
- Bh6/Bxh6 Fianchetto Destruction — CCT Scan Protocol
- Bh6/Bxh6 Fianchetto Destruction — Blunder Prevention
- Bh6/Bxh6 Fianchetto Destruction — Visualization Tree
- Bh6/Bxh6 Fianchetto Destruction — Move-Order Inversion
- Bh6/Bxh6 Fianchetto Destruction — Defensive Only-Moves
- Bh6/Bxh6 Fianchetto Destruction — Blitz Pattern Reflex
- Bh6/Bxh6 Fianchetto Destruction — Coached Mode Drill
- Bh6/Bxh6 Fianchetto Destruction — Engine Sparring
- Bh6/Bxh6 Fianchetto Destruction — Coordinate Chunking
- Bh6/Bxh6 Fianchetto Destruction — Mistake Retry Loop
- Nxf7 Fork & Extraction Sacrifice — CCT Scan Protocol
- Nxf7 Fork & Extraction Sacrifice — Blunder Prevention
- Nxf7 Fork & Extraction Sacrifice — Visualization Tree
- Nxf7 Fork & Extraction Sacrifice — Move-Order Inversion
- Nxf7 Fork & Extraction Sacrifice — Defensive Only-Moves
- Nxf7 Fork & Extraction Sacrifice — Blitz Pattern Reflex
- Nxf7 Fork & Extraction Sacrifice — Coached Mode Drill
- Nxf7 Fork & Extraction Sacrifice — Engine Sparring
- Nxf7 Fork & Extraction Sacrifice — Coordinate Chunking
- Nxf7 Fork & Extraction Sacrifice — Mistake Retry Loop
- Nd5 Knight Outpost Sacrifice in Sicilian — CCT Scan Protocol
- Nd5 Knight Outpost Sacrifice in Sicilian — Blunder Prevention
- Nd5 Knight Outpost Sacrifice in Sicilian — Visualization Tree
- Nd5 Knight Outpost Sacrifice in Sicilian — Move-Order Inversion
- Nd5 Knight Outpost Sacrifice in Sicilian — Defensive Only-Moves
- Nd5 Knight Outpost Sacrifice in Sicilian — Blitz Pattern Reflex
- Nd5 Knight Outpost Sacrifice in Sicilian — Coached Mode Drill
- Nd5 Knight Outpost Sacrifice in Sicilian — Engine Sparring
- Nd5 Knight Outpost Sacrifice in Sicilian — Coordinate Chunking
- Nd5 Knight Outpost Sacrifice in Sicilian — Mistake Retry Loop
- Nf5 Sacrifice in Open Sicilian — CCT Scan Protocol
- Nf5 Sacrifice in Open Sicilian — Blunder Prevention
- Nf5 Sacrifice in Open Sicilian — Visualization Tree
- Nf5 Sacrifice in Open Sicilian — Move-Order Inversion
- Nf5 Sacrifice in Open Sicilian — Defensive Only-Moves
- Nf5 Sacrifice in Open Sicilian — Blitz Pattern Reflex
- Nf5 Sacrifice in Open Sicilian — Coached Mode Drill
- Nf5 Sacrifice in Open Sicilian — Engine Sparring
- Nf5 Sacrifice in Open Sicilian — Coordinate Chunking
- Nf5 Sacrifice in Open Sicilian — Mistake Retry Loop
- Bxe6 Central Demolition Sacrifice — CCT Scan Protocol
- Bxe6 Central Demolition Sacrifice — Blunder Prevention
- Bxe6 Central Demolition Sacrifice — Visualization Tree
- Bxe6 Central Demolition Sacrifice — Move-Order Inversion
- Bxe6 Central Demolition Sacrifice — Defensive Only-Moves
- Bxe6 Central Demolition Sacrifice — Blitz Pattern Reflex
- Bxe6 Central Demolition Sacrifice — Coached Mode Drill
- Bxe6 Central Demolition Sacrifice — Engine Sparring
- Bxe6 Central Demolition Sacrifice — Coordinate Chunking
- Bxe6 Central Demolition Sacrifice — Mistake Retry Loop
- Rxc3 Sicilian Exchange Sacrifice — CCT Scan Protocol
- Rxc3 Sicilian Exchange Sacrifice — Blunder Prevention
- Rxc3 Sicilian Exchange Sacrifice — Visualization Tree
- Rxc3 Sicilian Exchange Sacrifice — Move-Order Inversion
- Rxc3 Sicilian Exchange Sacrifice — Defensive Only-Moves
- Rxc3 Sicilian Exchange Sacrifice — Blitz Pattern Reflex
- Rxc3 Sicilian Exchange Sacrifice — Coached Mode Drill
- Rxc3 Sicilian Exchange Sacrifice — Engine Sparring
- Rxc3 Sicilian Exchange Sacrifice — Coordinate Chunking
- Rxc3 Sicilian Exchange Sacrifice — Mistake Retry Loop
- Back-Rank Mate (Corridor Mate) — CCT Scan Protocol
- Back-Rank Mate (Corridor Mate) — Blunder Prevention
- Back-Rank Mate (Corridor Mate) — Visualization Tree
- Back-Rank Mate (Corridor Mate) — Move-Order Inversion
- Back-Rank Mate (Corridor Mate) — Defensive Only-Moves
- Back-Rank Mate (Corridor Mate) — Blitz Pattern Reflex
- Back-Rank Mate (Corridor Mate) — Coached Mode Drill
- Back-Rank Mate (Corridor Mate) — Engine Sparring
- Back-Rank Mate (Corridor Mate) — Coordinate Chunking
- Back-Rank Mate (Corridor Mate) — Mistake Retry Loop
- Weak Back-Rank Luft Creation (h3/g3) — CCT Scan Protocol
- Weak Back-Rank Luft Creation (h3/g3) — Blunder Prevention
- Weak Back-Rank Luft Creation (h3/g3) — Visualization Tree
- Weak Back-Rank Luft Creation (h3/g3) — Move-Order Inversion
- Weak Back-Rank Luft Creation (h3/g3) — Defensive Only-Moves
- Weak Back-Rank Luft Creation (h3/g3) — Blitz Pattern Reflex
- Weak Back-Rank Luft Creation (h3/g3) — Coached Mode Drill
- Weak Back-Rank Luft Creation (h3/g3) — Engine Sparring
- Weak Back-Rank Luft Creation (h3/g3) — Coordinate Chunking
- Weak Back-Rank Luft Creation (h3/g3) — Mistake Retry Loop
- Smothered Mate (Philidor's Legacy Nf7/Nh6/Qg8+) — CCT Scan Protocol
- Smothered Mate (Philidor's Legacy Nf7/Nh6/Qg8+) — Blunder Prevention
- Smothered Mate (Philidor's Legacy Nf7/Nh6/Qg8+) — Visualization Tree
- Smothered Mate (Philidor's Legacy Nf7/Nh6/Qg8+) — Move-Order Inversion
- Smothered Mate (Philidor's Legacy Nf7/Nh6/Qg8+) — Defensive Only-Moves
- Smothered Mate (Philidor's Legacy Nf7/Nh6/Qg8+) — Blitz Pattern Reflex
- Smothered Mate (Philidor's Legacy Nf7/Nh6/Qg8+) — Coached Mode Drill
- Smothered Mate (Philidor's Legacy Nf7/Nh6/Qg8+) — Engine Sparring
- Smothered Mate (Philidor's Legacy Nf7/Nh6/Qg8+) — Coordinate Chunking
- Smothered Mate (Philidor's Legacy Nf7/Nh6/Qg8+) — Mistake Retry Loop
- Anastasia's Mate (Ne7+ & Rook h-File) — CCT Scan Protocol
- Anastasia's Mate (Ne7+ & Rook h-File) — Blunder Prevention
- Anastasia's Mate (Ne7+ & Rook h-File) — Visualization Tree
- Anastasia's Mate (Ne7+ & Rook h-File) — Move-Order Inversion
- Anastasia's Mate (Ne7+ & Rook h-File) — Defensive Only-Moves
- Anastasia's Mate (Ne7+ & Rook h-File) — Blitz Pattern Reflex
- Anastasia's Mate (Ne7+ & Rook h-File) — Coached Mode Drill
- Anastasia's Mate (Ne7+ & Rook h-File) — Engine Sparring
- Anastasia's Mate (Ne7+ & Rook h-File) — Coordinate Chunking
- Anastasia's Mate (Ne7+ & Rook h-File) — Mistake Retry Loop
- Arabian Mate (Knight + Rook Corner) — CCT Scan Protocol
- Arabian Mate (Knight + Rook Corner) — Blunder Prevention
- Arabian Mate (Knight + Rook Corner) — Visualization Tree
- Arabian Mate (Knight + Rook Corner) — Move-Order Inversion
- Arabian Mate (Knight + Rook Corner) — Defensive Only-Moves
- Arabian Mate (Knight + Rook Corner) — Blitz Pattern Reflex
- Arabian Mate (Knight + Rook Corner) — Coached Mode Drill
- Arabian Mate (Knight + Rook Corner) — Engine Sparring
- Arabian Mate (Knight + Rook Corner) — Coordinate Chunking
- Arabian Mate (Knight + Rook Corner) — Mistake Retry Loop
- Boden's Mate (Criss-Cross Bishops) — CCT Scan Protocol
- Boden's Mate (Criss-Cross Bishops) — Blunder Prevention
- Boden's Mate (Criss-Cross Bishops) — Visualization Tree
- Boden's Mate (Criss-Cross Bishops) — Move-Order Inversion
- Boden's Mate (Criss-Cross Bishops) — Defensive Only-Moves
- Boden's Mate (Criss-Cross Bishops) — Blitz Pattern Reflex
- Boden's Mate (Criss-Cross Bishops) — Coached Mode Drill
- Boden's Mate (Criss-Cross Bishops) — Engine Sparring
- Boden's Mate (Criss-Cross Bishops) — Coordinate Chunking
- Boden's Mate (Criss-Cross Bishops) — Mistake Retry Loop
- Opera Mate (Morphy's Bishop + Rook) — CCT Scan Protocol
- Opera Mate (Morphy's Bishop + Rook) — Blunder Prevention
- Opera Mate (Morphy's Bishop + Rook) — Visualization Tree
- Opera Mate (Morphy's Bishop + Rook) — Move-Order Inversion
- Opera Mate (Morphy's Bishop + Rook) — Defensive Only-Moves
- Opera Mate (Morphy's Bishop + Rook) — Blitz Pattern Reflex
- Opera Mate (Morphy's Bishop + Rook) — Coached Mode Drill
- Opera Mate (Morphy's Bishop + Rook) — Engine Sparring
- Opera Mate (Morphy's Bishop + Rook) — Coordinate Chunking
- Opera Mate (Morphy's Bishop + Rook) — Mistake Retry Loop
- Damiano's Bishop Mate (Qh7#) — CCT Scan Protocol
- Damiano's Bishop Mate (Qh7#) — Blunder Prevention
- Damiano's Bishop Mate (Qh7#) — Visualization Tree
- Damiano's Bishop Mate (Qh7#) — Move-Order Inversion
- Damiano's Bishop Mate (Qh7#) — Defensive Only-Moves
- Damiano's Bishop Mate (Qh7#) — Blitz Pattern Reflex
- Damiano's Bishop Mate (Qh7#) — Coached Mode Drill
- Damiano's Bishop Mate (Qh7#) — Engine Sparring
- Damiano's Bishop Mate (Qh7#) — Coordinate Chunking
- Damiano's Bishop Mate (Qh7#) — Mistake Retry Loop
- Damiano's Pawn Mate (g6-h5 Corridor) — CCT Scan Protocol
- Damiano's Pawn Mate (g6-h5 Corridor) — Blunder Prevention
- Damiano's Pawn Mate (g6-h5 Corridor) — Visualization Tree
- Damiano's Pawn Mate (g6-h5 Corridor) — Move-Order Inversion
- Damiano's Pawn Mate (g6-h5 Corridor) — Defensive Only-Moves
- Damiano's Pawn Mate (g6-h5 Corridor) — Blitz Pattern Reflex
- Damiano's Pawn Mate (g6-h5 Corridor) — Coached Mode Drill
- Damiano's Pawn Mate (g6-h5 Corridor) — Engine Sparring
- Damiano's Pawn Mate (g6-h5 Corridor) — Coordinate Chunking
- Damiano's Pawn Mate (g6-h5 Corridor) — Mistake Retry Loop
- Lolli's Mate (f6 Pawn + Queen g7#) — CCT Scan Protocol
- Lolli's Mate (f6 Pawn + Queen g7#) — Blunder Prevention
- Lolli's Mate (f6 Pawn + Queen g7#) — Visualization Tree
- Lolli's Mate (f6 Pawn + Queen g7#) — Move-Order Inversion
- Lolli's Mate (f6 Pawn + Queen g7#) — Defensive Only-Moves
- Lolli's Mate (f6 Pawn + Queen g7#) — Blitz Pattern Reflex
- Lolli's Mate (f6 Pawn + Queen g7#) — Coached Mode Drill
- Lolli's Mate (f6 Pawn + Queen g7#) — Engine Sparring
- Lolli's Mate (f6 Pawn + Queen g7#) — Coordinate Chunking
- Lolli's Mate (f6 Pawn + Queen g7#) — Mistake Retry Loop
- Hook Mate (Rook + Knight + Pawn) — CCT Scan Protocol
- Hook Mate (Rook + Knight + Pawn) — Blunder Prevention
- Hook Mate (Rook + Knight + Pawn) — Visualization Tree
- Hook Mate (Rook + Knight + Pawn) — Move-Order Inversion
- Hook Mate (Rook + Knight + Pawn) — Defensive Only-Moves
- Hook Mate (Rook + Knight + Pawn) — Blitz Pattern Reflex
- Hook Mate (Rook + Knight + Pawn) — Coached Mode Drill
- Hook Mate (Rook + Knight + Pawn) — Engine Sparring
- Hook Mate (Rook + Knight + Pawn) — Coordinate Chunking
- Hook Mate (Rook + Knight + Pawn) — Mistake Retry Loop
- Blackburne's Mate (Two Bishops + Knight) — CCT Scan Protocol
- Blackburne's Mate (Two Bishops + Knight) — Blunder Prevention
- Blackburne's Mate (Two Bishops + Knight) — Visualization Tree
- Blackburne's Mate (Two Bishops + Knight) — Move-Order Inversion
- Blackburne's Mate (Two Bishops + Knight) — Defensive Only-Moves
- Blackburne's Mate (Two Bishops + Knight) — Blitz Pattern Reflex
- Blackburne's Mate (Two Bishops + Knight) — Coached Mode Drill
- Blackburne's Mate (Two Bishops + Knight) — Engine Sparring
- Blackburne's Mate (Two Bishops + Knight) — Coordinate Chunking
- Blackburne's Mate (Two Bishops + Knight) — Mistake Retry Loop
- Pillsbury's Mate (Rook g-File + Bishop) — CCT Scan Protocol
- Pillsbury's Mate (Rook g-File + Bishop) — Blunder Prevention
- Pillsbury's Mate (Rook g-File + Bishop) — Visualization Tree
- Pillsbury's Mate (Rook g-File + Bishop) — Move-Order Inversion
- Pillsbury's Mate (Rook g-File + Bishop) — Defensive Only-Moves
- Pillsbury's Mate (Rook g-File + Bishop) — Blitz Pattern Reflex
- Pillsbury's Mate (Rook g-File + Bishop) — Coached Mode Drill
- Pillsbury's Mate (Rook g-File + Bishop) — Engine Sparring
- Pillsbury's Mate (Rook g-File + Bishop) — Coordinate Chunking
- Pillsbury's Mate (Rook g-File + Bishop) — Mistake Retry Loop
- Morphy's Mate (Bishop + Rook g-File) — CCT Scan Protocol
- Morphy's Mate (Bishop + Rook g-File) — Blunder Prevention
- Morphy's Mate (Bishop + Rook g-File) — Visualization Tree
- Morphy's Mate (Bishop + Rook g-File) — Move-Order Inversion
- Morphy's Mate (Bishop + Rook g-File) — Defensive Only-Moves
- Morphy's Mate (Bishop + Rook g-File) — Blitz Pattern Reflex
- Morphy's Mate (Bishop + Rook g-File) — Coached Mode Drill
- Morphy's Mate (Bishop + Rook g-File) — Engine Sparring
- Morphy's Mate (Bishop + Rook g-File) — Coordinate Chunking
- Morphy's Mate (Bishop + Rook g-File) — Mistake Retry Loop
- Anderssen's Mate (h7 Pawn + Rook h8) — CCT Scan Protocol
- Anderssen's Mate (h7 Pawn + Rook h8) — Blunder Prevention
- Anderssen's Mate (h7 Pawn + Rook h8) — Visualization Tree
- Anderssen's Mate (h7 Pawn + Rook h8) — Move-Order Inversion
- Anderssen's Mate (h7 Pawn + Rook h8) — Defensive Only-Moves
- Anderssen's Mate (h7 Pawn + Rook h8) — Blitz Pattern Reflex
- Anderssen's Mate (h7 Pawn + Rook h8) — Coached Mode Drill
- Anderssen's Mate (h7 Pawn + Rook h8) — Engine Sparring
- Anderssen's Mate (h7 Pawn + Rook h8) — Coordinate Chunking
- Anderssen's Mate (h7 Pawn + Rook h8) — Mistake Retry Loop
- Mayet's Mate (Rook supported by Distant Bishop) — CCT Scan Protocol
- Mayet's Mate (Rook supported by Distant Bishop) — Blunder Prevention
- Mayet's Mate (Rook supported by Distant Bishop) — Visualization Tree
- Mayet's Mate (Rook supported by Distant Bishop) — Move-Order Inversion
- Mayet's Mate (Rook supported by Distant Bishop) — Defensive Only-Moves
- Mayet's Mate (Rook supported by Distant Bishop) — Blitz Pattern Reflex
- Mayet's Mate (Rook supported by Distant Bishop) — Coached Mode Drill
- Mayet's Mate (Rook supported by Distant Bishop) — Engine Sparring
- Mayet's Mate (Rook supported by Distant Bishop) — Coordinate Chunking
- Mayet's Mate (Rook supported by Distant Bishop) — Mistake Retry Loop
- Greco's Mate (Bishop Diagonals + Queen h-File) — CCT Scan Protocol
- Greco's Mate (Bishop Diagonals + Queen h-File) — Blunder Prevention
- Greco's Mate (Bishop Diagonals + Queen h-File) — Visualization Tree
- Greco's Mate (Bishop Diagonals + Queen h-File) — Move-Order Inversion
- Greco's Mate (Bishop Diagonals + Queen h-File) — Defensive Only-Moves
- Greco's Mate (Bishop Diagonals + Queen h-File) — Blitz Pattern Reflex
- Greco's Mate (Bishop Diagonals + Queen h-File) — Coached Mode Drill
- Greco's Mate (Bishop Diagonals + Queen h-File) — Engine Sparring
- Greco's Mate (Bishop Diagonals + Queen h-File) — Coordinate Chunking
- Greco's Mate (Bishop Diagonals + Queen h-File) — Mistake Retry Loop
- Cozio's Dovetail Mate — CCT Scan Protocol
- Cozio's Dovetail Mate — Blunder Prevention
- Cozio's Dovetail Mate — Visualization Tree
- Cozio's Dovetail Mate — Move-Order Inversion
- Cozio's Dovetail Mate — Defensive Only-Moves
- Cozio's Dovetail Mate — Blitz Pattern Reflex
- Cozio's Dovetail Mate — Coached Mode Drill
- Cozio's Dovetail Mate — Engine Sparring
- Cozio's Dovetail Mate — Coordinate Chunking
- Cozio's Dovetail Mate — Mistake Retry Loop
- Swallow's Tail (Guéridon) Mate — CCT Scan Protocol
- Swallow's Tail (Guéridon) Mate — Blunder Prevention
- Swallow's Tail (Guéridon) Mate — Visualization Tree
- Swallow's Tail (Guéridon) Mate — Move-Order Inversion
- Swallow's Tail (Guéridon) Mate — Defensive Only-Moves
- Swallow's Tail (Guéridon) Mate — Blitz Pattern Reflex
- Swallow's Tail (Guéridon) Mate — Coached Mode Drill
- Swallow's Tail (Guéridon) Mate — Engine Sparring
- Swallow's Tail (Guéridon) Mate — Coordinate Chunking
- Swallow's Tail (Guéridon) Mate — Mistake Retry Loop
- Epaulette Mate (King Flanked by Own Rooks) — CCT Scan Protocol
- Epaulette Mate (King Flanked by Own Rooks) — Blunder Prevention
- Epaulette Mate (King Flanked by Own Rooks) — Visualization Tree
- Epaulette Mate (King Flanked by Own Rooks) — Move-Order Inversion
- Epaulette Mate (King Flanked by Own Rooks) — Defensive Only-Moves
- Epaulette Mate (King Flanked by Own Rooks) — Blitz Pattern Reflex
- Epaulette Mate (King Flanked by Own Rooks) — Coached Mode Drill
- Epaulette Mate (King Flanked by Own Rooks) — Engine Sparring
- Epaulette Mate (King Flanked by Own Rooks) — Coordinate Chunking
- Epaulette Mate (King Flanked by Own Rooks) — Mistake Retry Loop
- Suffocation Mate (Knight + Bishop) — CCT Scan Protocol
- Suffocation Mate (Knight + Bishop) — Blunder Prevention
- Suffocation Mate (Knight + Bishop) — Visualization Tree
- Suffocation Mate (Knight + Bishop) — Move-Order Inversion
- Suffocation Mate (Knight + Bishop) — Defensive Only-Moves
- Suffocation Mate (Knight + Bishop) — Blitz Pattern Reflex
- Suffocation Mate (Knight + Bishop) — Coached Mode Drill
- Suffocation Mate (Knight + Bishop) — Engine Sparring
- Suffocation Mate (Knight + Bishop) — Coordinate Chunking
- Suffocation Mate (Knight + Bishop) — Mistake Retry Loop
- Corner Mate (Knight Edge Trap) — CCT Scan Protocol
- Corner Mate (Knight Edge Trap) — Blunder Prevention
- Corner Mate (Knight Edge Trap) — Visualization Tree
- Corner Mate (Knight Edge Trap) — Move-Order Inversion
- Corner Mate (Knight Edge Trap) — Defensive Only-Moves
- Corner Mate (Knight Edge Trap) — Blitz Pattern Reflex
- Corner Mate (Knight Edge Trap) — Coached Mode Drill
- Corner Mate (Knight Edge Trap) — Engine Sparring
- Corner Mate (Knight Edge Trap) — Coordinate Chunking
- Corner Mate (Knight Edge Trap) — Mistake Retry Loop
- Vukovic Mate (Rook + Knight Central) — CCT Scan Protocol
- Vukovic Mate (Rook + Knight Central) — Blunder Prevention
- Vukovic Mate (Rook + Knight Central) — Visualization Tree
- Vukovic Mate (Rook + Knight Central) — Move-Order Inversion
- Vukovic Mate (Rook + Knight Central) — Defensive Only-Moves
- Vukovic Mate (Rook + Knight Central) — Blitz Pattern Reflex
- Vukovic Mate (Rook + Knight Central) — Coached Mode Drill
- Vukovic Mate (Rook + Knight Central) — Engine Sparring
- Vukovic Mate (Rook + Knight Central) — Coordinate Chunking
- Vukovic Mate (Rook + Knight Central) — Mistake Retry Loop
- Reti's Mate (Bishop + Rook d8) — CCT Scan Protocol
- Reti's Mate (Bishop + Rook d8) — Blunder Prevention
- Reti's Mate (Bishop + Rook d8) — Visualization Tree
- Reti's Mate (Bishop + Rook d8) — Move-Order Inversion
- Reti's Mate (Bishop + Rook d8) — Defensive Only-Moves
- Reti's Mate (Bishop + Rook d8) — Blitz Pattern Reflex
- Reti's Mate (Bishop + Rook d8) — Coached Mode Drill
- Reti's Mate (Bishop + Rook d8) — Engine Sparring
- Reti's Mate (Bishop + Rook d8) — Coordinate Chunking
- Reti's Mate (Bishop + Rook d8) — Mistake Retry Loop
- Legal's Mate Trap (Nxe5 Bxd1 Bxf7+) — CCT Scan Protocol
- Legal's Mate Trap (Nxe5 Bxd1 Bxf7+) — Blunder Prevention
- Legal's Mate Trap (Nxe5 Bxd1 Bxf7+) — Visualization Tree
- Legal's Mate Trap (Nxe5 Bxd1 Bxf7+) — Move-Order Inversion
- Legal's Mate Trap (Nxe5 Bxd1 Bxf7+) — Defensive Only-Moves
- Legal's Mate Trap (Nxe5 Bxd1 Bxf7+) — Blitz Pattern Reflex
- Legal's Mate Trap (Nxe5 Bxd1 Bxf7+) — Coached Mode Drill
- Legal's Mate Trap (Nxe5 Bxd1 Bxf7+) — Engine Sparring
- Legal's Mate Trap (Nxe5 Bxd1 Bxf7+) — Coordinate Chunking
- Legal's Mate Trap (Nxe5 Bxd1 Bxf7+) — Mistake Retry Loop
- Noah's Ark Trap (Trapping the Bishop) — CCT Scan Protocol
- Noah's Ark Trap (Trapping the Bishop) — Blunder Prevention
- Noah's Ark Trap (Trapping the Bishop) — Visualization Tree
- Noah's Ark Trap (Trapping the Bishop) — Move-Order Inversion
- Noah's Ark Trap (Trapping the Bishop) — Defensive Only-Moves
- Noah's Ark Trap (Trapping the Bishop) — Blitz Pattern Reflex
- Noah's Ark Trap (Trapping the Bishop) — Coached Mode Drill
- Noah's Ark Trap (Trapping the Bishop) — Engine Sparring
- Noah's Ark Trap (Trapping the Bishop) — Coordinate Chunking
- Noah's Ark Trap (Trapping the Bishop) — Mistake Retry Loop
- Fishing Pole Trap on the h-File — CCT Scan Protocol
- Fishing Pole Trap on the h-File — Blunder Prevention
- Fishing Pole Trap on the h-File — Visualization Tree
- Fishing Pole Trap on the h-File — Move-Order Inversion
- Fishing Pole Trap on the h-File — Defensive Only-Moves
- Fishing Pole Trap on the h-File — Blitz Pattern Reflex
- Fishing Pole Trap on the h-File — Coached Mode Drill
- Fishing Pole Trap on the h-File — Engine Sparring
- Fishing Pole Trap on the h-File — Coordinate Chunking
- Fishing Pole Trap on the h-File — Mistake Retry Loop
- Lasker's Trap Underpromotion (fxg1=N+) — CCT Scan Protocol
- Lasker's Trap Underpromotion (fxg1=N+) — Blunder Prevention
- Lasker's Trap Underpromotion (fxg1=N+) — Visualization Tree
- Lasker's Trap Underpromotion (fxg1=N+) — Move-Order Inversion
- Lasker's Trap Underpromotion (fxg1=N+) — Defensive Only-Moves
- Lasker's Trap Underpromotion (fxg1=N+) — Blitz Pattern Reflex
- Lasker's Trap Underpromotion (fxg1=N+) — Coached Mode Drill
- Lasker's Trap Underpromotion (fxg1=N+) — Engine Sparring
- Lasker's Trap Underpromotion (fxg1=N+) — Coordinate Chunking
- Lasker's Trap Underpromotion (fxg1=N+) — Mistake Retry Loop
- Rubinstein Trap (Queen Trapped in Center) — CCT Scan Protocol
- Rubinstein Trap (Queen Trapped in Center) — Blunder Prevention
- Rubinstein Trap (Queen Trapped in Center) — Visualization Tree
- Rubinstein Trap (Queen Trapped in Center) — Move-Order Inversion
- Rubinstein Trap (Queen Trapped in Center) — Defensive Only-Moves
- Rubinstein Trap (Queen Trapped in Center) — Blitz Pattern Reflex
- Rubinstein Trap (Queen Trapped in Center) — Coached Mode Drill
- Rubinstein Trap (Queen Trapped in Center) — Engine Sparring
- Rubinstein Trap (Queen Trapped in Center) — Coordinate Chunking
- Rubinstein Trap (Queen Trapped in Center) — Mistake Retry Loop
- Siberian Trap in Smith-Morra Gambit — CCT Scan Protocol
- Siberian Trap in Smith-Morra Gambit — Blunder Prevention
- Siberian Trap in Smith-Morra Gambit — Visualization Tree
- Siberian Trap in Smith-Morra Gambit — Move-Order Inversion
- Siberian Trap in Smith-Morra Gambit — Defensive Only-Moves
- Siberian Trap in Smith-Morra Gambit — Blitz Pattern Reflex
- Siberian Trap in Smith-Morra Gambit — Coached Mode Drill
- Siberian Trap in Smith-Morra Gambit — Engine Sparring
- Siberian Trap in Smith-Morra Gambit — Coordinate Chunking
- Siberian Trap in Smith-Morra Gambit — Mistake Retry Loop
- Halosar Trap in Blackmar-Diemer — CCT Scan Protocol
- Halosar Trap in Blackmar-Diemer — Blunder Prevention
- Halosar Trap in Blackmar-Diemer — Visualization Tree
- Halosar Trap in Blackmar-Diemer — Move-Order Inversion
- Halosar Trap in Blackmar-Diemer — Defensive Only-Moves
- Halosar Trap in Blackmar-Diemer — Blitz Pattern Reflex
- Halosar Trap in Blackmar-Diemer — Coached Mode Drill
- Halosar Trap in Blackmar-Diemer — Engine Sparring
- Halosar Trap in Blackmar-Diemer — Coordinate Chunking
- Halosar Trap in Blackmar-Diemer — Mistake Retry Loop
- Kieninger Trap (Budapest Gambit Smothered) — CCT Scan Protocol
- Kieninger Trap (Budapest Gambit Smothered) — Blunder Prevention
- Kieninger Trap (Budapest Gambit Smothered) — Visualization Tree
- Kieninger Trap (Budapest Gambit Smothered) — Move-Order Inversion
- Kieninger Trap (Budapest Gambit Smothered) — Defensive Only-Moves
- Kieninger Trap (Budapest Gambit Smothered) — Blitz Pattern Reflex
- Kieninger Trap (Budapest Gambit Smothered) — Coached Mode Drill
- Kieninger Trap (Budapest Gambit Smothered) — Engine Sparring
- Kieninger Trap (Budapest Gambit Smothered) — Coordinate Chunking
- Kieninger Trap (Budapest Gambit Smothered) — Mistake Retry Loop
- Mortimer Trap in Ruy Lopez — CCT Scan Protocol
- Mortimer Trap in Ruy Lopez — Blunder Prevention
- Mortimer Trap in Ruy Lopez — Visualization Tree
- Mortimer Trap in Ruy Lopez — Move-Order Inversion
- Mortimer Trap in Ruy Lopez — Defensive Only-Moves
- Mortimer Trap in Ruy Lopez — Blitz Pattern Reflex
- Mortimer Trap in Ruy Lopez — Coached Mode Drill
- Mortimer Trap in Ruy Lopez — Engine Sparring
- Mortimer Trap in Ruy Lopez — Coordinate Chunking
- Mortimer Trap in Ruy Lopez — Mistake Retry Loop
- Tarrasch Trap in Open Ruy Lopez — CCT Scan Protocol
- Tarrasch Trap in Open Ruy Lopez — Blunder Prevention
- Tarrasch Trap in Open Ruy Lopez — Visualization Tree
- Tarrasch Trap in Open Ruy Lopez — Move-Order Inversion
- Tarrasch Trap in Open Ruy Lopez — Defensive Only-Moves
- Tarrasch Trap in Open Ruy Lopez — Blitz Pattern Reflex
- Tarrasch Trap in Open Ruy Lopez — Coached Mode Drill
- Tarrasch Trap in Open Ruy Lopez — Engine Sparring
- Tarrasch Trap in Open Ruy Lopez — Coordinate Chunking
- Tarrasch Trap in Open Ruy Lopez — Mistake Retry Loop
- Cambridge Springs Queen Fork Trap — CCT Scan Protocol
- Cambridge Springs Queen Fork Trap — Blunder Prevention
- Cambridge Springs Queen Fork Trap — Visualization Tree
- Cambridge Springs Queen Fork Trap — Move-Order Inversion
- Cambridge Springs Queen Fork Trap — Defensive Only-Moves
- Cambridge Springs Queen Fork Trap — Blitz Pattern Reflex
- Cambridge Springs Queen Fork Trap — Coached Mode Drill
- Cambridge Springs Queen Fork Trap — Engine Sparring
- Cambridge Springs Queen Fork Trap — Coordinate Chunking
- Cambridge Springs Queen Fork Trap — Mistake Retry Loop
- Elephant Trap in Queen's Gambit — CCT Scan Protocol
- Elephant Trap in Queen's Gambit — Blunder Prevention
- Elephant Trap in Queen's Gambit — Visualization Tree
- Elephant Trap in Queen's Gambit — Move-Order Inversion
- Elephant Trap in Queen's Gambit — Defensive Only-Moves
- Elephant Trap in Queen's Gambit — Blitz Pattern Reflex
- Elephant Trap in Queen's Gambit — Coached Mode Drill
- Elephant Trap in Queen's Gambit — Engine Sparring
- Elephant Trap in Queen's Gambit — Coordinate Chunking
- Elephant Trap in Queen's Gambit — Mistake Retry Loop
- Monticelli Trap in Bogo-Indian — CCT Scan Protocol
- Monticelli Trap in Bogo-Indian — Blunder Prevention
- Monticelli Trap in Bogo-Indian — Visualization Tree
- Monticelli Trap in Bogo-Indian — Move-Order Inversion
- Monticelli Trap in Bogo-Indian — Defensive Only-Moves
- Monticelli Trap in Bogo-Indian — Blitz Pattern Reflex
- Monticelli Trap in Bogo-Indian — Coached Mode Drill
- Monticelli Trap in Bogo-Indian — Engine Sparring
- Monticelli Trap in Bogo-Indian — Coordinate Chunking
- Monticelli Trap in Bogo-Indian — Mistake Retry Loop
- f7/f2 Weak Square Assault — CCT Scan Protocol
- f7/f2 Weak Square Assault — Blunder Prevention
- f7/f2 Weak Square Assault — Visualization Tree
- f7/f2 Weak Square Assault — Move-Order Inversion
- f7/f2 Weak Square Assault — Defensive Only-Moves
- f7/f2 Weak Square Assault — Blitz Pattern Reflex
- f7/f2 Weak Square Assault — Coached Mode Drill
- f7/f2 Weak Square Assault — Engine Sparring
- f7/f2 Weak Square Assault — Coordinate Chunking
- f7/f2 Weak Square Assault — Mistake Retry Loop
- g7/g2 Dark-Square Battery — CCT Scan Protocol
- g7/g2 Dark-Square Battery — Blunder Prevention
- g7/g2 Dark-Square Battery — Visualization Tree
- g7/g2 Dark-Square Battery — Move-Order Inversion
- g7/g2 Dark-Square Battery — Defensive Only-Moves
- g7/g2 Dark-Square Battery — Blitz Pattern Reflex
- g7/g2 Dark-Square Battery — Coached Mode Drill
- g7/g2 Dark-Square Battery — Engine Sparring
- g7/g2 Dark-Square Battery — Coordinate Chunking
- g7/g2 Dark-Square Battery — Mistake Retry Loop
- h7/h2 Castled King Demolition — CCT Scan Protocol
- h7/h2 Castled King Demolition — Blunder Prevention
- h7/h2 Castled King Demolition — Visualization Tree
- h7/h2 Castled King Demolition — Move-Order Inversion
- h7/h2 Castled King Demolition — Defensive Only-Moves
- h7/h2 Castled King Demolition — Blitz Pattern Reflex
- h7/h2 Castled King Demolition — Coached Mode Drill
- h7/h2 Castled King Demolition — Engine Sparring
- h7/h2 Castled King Demolition — Coordinate Chunking
- h7/h2 Castled King Demolition — Mistake Retry Loop
- d6/d3 Outpost Penetration — CCT Scan Protocol
- d6/d3 Outpost Penetration — Blunder Prevention
- d6/d3 Outpost Penetration — Visualization Tree
- d6/d3 Outpost Penetration — Move-Order Inversion
- d6/d3 Outpost Penetration — Defensive Only-Moves
- d6/d3 Outpost Penetration — Blitz Pattern Reflex
- d6/d3 Outpost Penetration — Coached Mode Drill
- d6/d3 Outpost Penetration — Engine Sparring
- d6/d3 Outpost Penetration — Coordinate Chunking
- d6/d3 Outpost Penetration — Mistake Retry Loop
- 7th Rank Pigs (Doubled Rooks on 7th) — CCT Scan Protocol
- 7th Rank Pigs (Doubled Rooks on 7th) — Blunder Prevention
- 7th Rank Pigs (Doubled Rooks on 7th) — Visualization Tree
- 7th Rank Pigs (Doubled Rooks on 7th) — Move-Order Inversion
- 7th Rank Pigs (Doubled Rooks on 7th) — Defensive Only-Moves
- 7th Rank Pigs (Doubled Rooks on 7th) — Blitz Pattern Reflex
- 7th Rank Pigs (Doubled Rooks on 7th) — Coached Mode Drill
- 7th Rank Pigs (Doubled Rooks on 7th) — Engine Sparring
- 7th Rank Pigs (Doubled Rooks on 7th) — Coordinate Chunking
- 7th Rank Pigs (Doubled Rooks on 7th) — Mistake Retry Loop
- Blind Swine Mate (Two Rooks on 7th/8th) — CCT Scan Protocol
- Blind Swine Mate (Two Rooks on 7th/8th) — Blunder Prevention
- Blind Swine Mate (Two Rooks on 7th/8th) — Visualization Tree
- Blind Swine Mate (Two Rooks on 7th/8th) — Move-Order Inversion
- Blind Swine Mate (Two Rooks on 7th/8th) — Defensive Only-Moves
- Blind Swine Mate (Two Rooks on 7th/8th) — Blitz Pattern Reflex
- Blind Swine Mate (Two Rooks on 7th/8th) — Coached Mode Drill
- Blind Swine Mate (Two Rooks on 7th/8th) — Engine Sparring
- Blind Swine Mate (Two Rooks on 7th/8th) — Coordinate Chunking
- Blind Swine Mate (Two Rooks on 7th/8th) — Mistake Retry Loop
- Queen + Knight Coordination on Dark Squares — CCT Scan Protocol
- Queen + Knight Coordination on Dark Squares — Blunder Prevention
- Queen + Knight Coordination on Dark Squares — Visualization Tree
- Queen + Knight Coordination on Dark Squares — Move-Order Inversion
- Queen + Knight Coordination on Dark Squares — Defensive Only-Moves
- Queen + Knight Coordination on Dark Squares — Blitz Pattern Reflex
- Queen + Knight Coordination on Dark Squares — Coached Mode Drill
- Queen + Knight Coordination on Dark Squares — Engine Sparring
- Queen + Knight Coordination on Dark Squares — Coordinate Chunking
- Queen + Knight Coordination on Dark Squares — Mistake Retry Loop
- Queen + Bishop Long-Diagonal Sniper — CCT Scan Protocol
- Queen + Bishop Long-Diagonal Sniper — Blunder Prevention
- Queen + Bishop Long-Diagonal Sniper — Visualization Tree
- Queen + Bishop Long-Diagonal Sniper — Move-Order Inversion
- Queen + Bishop Long-Diagonal Sniper — Defensive Only-Moves
- Queen + Bishop Long-Diagonal Sniper — Blitz Pattern Reflex
- Queen + Bishop Long-Diagonal Sniper — Coached Mode Drill
- Queen + Bishop Long-Diagonal Sniper — Engine Sparring
- Queen + Bishop Long-Diagonal Sniper — Coordinate Chunking
- Queen + Bishop Long-Diagonal Sniper — Mistake Retry Loop
- Rook Lift via 3rd or 4th Rank — CCT Scan Protocol
- Rook Lift via 3rd or 4th Rank — Blunder Prevention
- Rook Lift via 3rd or 4th Rank — Visualization Tree
- Rook Lift via 3rd or 4th Rank — Move-Order Inversion
- Rook Lift via 3rd or 4th Rank — Defensive Only-Moves
- Rook Lift via 3rd or 4th Rank — Blitz Pattern Reflex
- Rook Lift via 3rd or 4th Rank — Coached Mode Drill
- Rook Lift via 3rd or 4th Rank — Engine Sparring
- Rook Lift via 3rd or 4th Rank — Coordinate Chunking
- Rook Lift via 3rd or 4th Rank — Mistake Retry Loop
- Pawn Storm Against Opposite-Side Castling — CCT Scan Protocol
- Pawn Storm Against Opposite-Side Castling — Blunder Prevention
- Pawn Storm Against Opposite-Side Castling — Visualization Tree
- Pawn Storm Against Opposite-Side Castling — Move-Order Inversion
- Pawn Storm Against Opposite-Side Castling — Defensive Only-Moves
- Pawn Storm Against Opposite-Side Castling — Blitz Pattern Reflex
- Pawn Storm Against Opposite-Side Castling — Coached Mode Drill
- Pawn Storm Against Opposite-Side Castling — Engine Sparring
- Pawn Storm Against Opposite-Side Castling — Coordinate Chunking
- Pawn Storm Against Opposite-Side Castling — Mistake Retry Loop
- h-Pawn Ram (h4-h5-h6) Hook Target — CCT Scan Protocol
- h-Pawn Ram (h4-h5-h6) Hook Target — Blunder Prevention
- h-Pawn Ram (h4-h5-h6) Hook Target — Visualization Tree
- h-Pawn Ram (h4-h5-h6) Hook Target — Move-Order Inversion
- h-Pawn Ram (h4-h5-h6) Hook Target — Defensive Only-Moves
- h-Pawn Ram (h4-h5-h6) Hook Target — Blitz Pattern Reflex
- h-Pawn Ram (h4-h5-h6) Hook Target — Coached Mode Drill
- h-Pawn Ram (h4-h5-h6) Hook Target — Engine Sparring
- h-Pawn Ram (h4-h5-h6) Hook Target — Coordinate Chunking
- h-Pawn Ram (h4-h5-h6) Hook Target — Mistake Retry Loop
- Minority Attack Pawn Break (b4-b5) — CCT Scan Protocol
- Minority Attack Pawn Break (b4-b5) — Blunder Prevention
- Minority Attack Pawn Break (b4-b5) — Visualization Tree
- Minority Attack Pawn Break (b4-b5) — Move-Order Inversion
- Minority Attack Pawn Break (b4-b5) — Defensive Only-Moves
- Minority Attack Pawn Break (b4-b5) — Blitz Pattern Reflex
- Minority Attack Pawn Break (b4-b5) — Coached Mode Drill
- Minority Attack Pawn Break (b4-b5) — Engine Sparring
- Minority Attack Pawn Break (b4-b5) — Coordinate Chunking
- Minority Attack Pawn Break (b4-b5) — Mistake Retry Loop
- Central e4-e5 / d4-d5 Pawn Roller — CCT Scan Protocol
- Central e4-e5 / d4-d5 Pawn Roller — Blunder Prevention
- Central e4-e5 / d4-d5 Pawn Roller — Visualization Tree
- Central e4-e5 / d4-d5 Pawn Roller — Move-Order Inversion
- Central e4-e5 / d4-d5 Pawn Roller — Defensive Only-Moves
- Central e4-e5 / d4-d5 Pawn Roller — Blitz Pattern Reflex
- Central e4-e5 / d4-d5 Pawn Roller — Coached Mode Drill
- Central e4-e5 / d4-d5 Pawn Roller — Engine Sparring
- Central e4-e5 / d4-d5 Pawn Roller — Coordinate Chunking
- Central e4-e5 / d4-d5 Pawn Roller — Mistake Retry Loop
- Passed Pawn Promotion Race — CCT Scan Protocol
- Passed Pawn Promotion Race — Blunder Prevention
- Passed Pawn Promotion Race — Visualization Tree
- Passed Pawn Promotion Race — Move-Order Inversion
- Passed Pawn Promotion Race — Defensive Only-Moves
- Passed Pawn Promotion Race — Blitz Pattern Reflex
- Passed Pawn Promotion Race — Coached Mode Drill
- Passed Pawn Promotion Race — Engine Sparring
- Passed Pawn Promotion Race — Coordinate Chunking
- Passed Pawn Promotion Race — Mistake Retry Loop
- Outside Passed Pawn Decoy — CCT Scan Protocol
- Outside Passed Pawn Decoy — Blunder Prevention
- Outside Passed Pawn Decoy — Visualization Tree
- Outside Passed Pawn Decoy — Move-Order Inversion
- Outside Passed Pawn Decoy — Defensive Only-Moves
- Outside Passed Pawn Decoy — Blitz Pattern Reflex
- Outside Passed Pawn Decoy — Coached Mode Drill
- Outside Passed Pawn Decoy — Engine Sparring
- Outside Passed Pawn Decoy — Coordinate Chunking
- Outside Passed Pawn Decoy — Mistake Retry Loop
- Protected Passed Pawn Wedge — CCT Scan Protocol
- Protected Passed Pawn Wedge — Blunder Prevention
- Protected Passed Pawn Wedge — Visualization Tree
- Protected Passed Pawn Wedge — Move-Order Inversion
- Protected Passed Pawn Wedge — Defensive Only-Moves
- Protected Passed Pawn Wedge — Blitz Pattern Reflex
- Protected Passed Pawn Wedge — Coached Mode Drill
- Protected Passed Pawn Wedge — Engine Sparring
- Protected Passed Pawn Wedge — Coordinate Chunking
- Protected Passed Pawn Wedge — Mistake Retry Loop
- Connected Passed Pawns on 6th Rank — CCT Scan Protocol
- Connected Passed Pawns on 6th Rank — Blunder Prevention
- Connected Passed Pawns on 6th Rank — Visualization Tree
- Connected Passed Pawns on 6th Rank — Move-Order Inversion
- Connected Passed Pawns on 6th Rank — Defensive Only-Moves
- Connected Passed Pawns on 6th Rank — Blitz Pattern Reflex
- Connected Passed Pawns on 6th Rank — Coached Mode Drill
- Connected Passed Pawns on 6th Rank — Engine Sparring
- Connected Passed Pawns on 6th Rank — Coordinate Chunking
- Connected Passed Pawns on 6th Rank — Mistake Retry Loop
- Trapping an Offside Knight on Rim — CCT Scan Protocol
- Trapping an Offside Knight on Rim — Blunder Prevention
- Trapping an Offside Knight on Rim — Visualization Tree
- Trapping an Offside Knight on Rim — Move-Order Inversion
- Trapping an Offside Knight on Rim — Defensive Only-Moves
- Trapping an Offside Knight on Rim — Blitz Pattern Reflex
- Trapping an Offside Knight on Rim — Coached Mode Drill
- Trapping an Offside Knight on Rim — Engine Sparring
- Trapping an Offside Knight on Rim — Coordinate Chunking
- Trapping an Offside Knight on Rim — Mistake Retry Loop
- Trapping an Fianchettoed Bishop — CCT Scan Protocol
- Trapping an Fianchettoed Bishop — Blunder Prevention
- Trapping an Fianchettoed Bishop — Visualization Tree
- Trapping an Fianchettoed Bishop — Move-Order Inversion
- Trapping an Fianchettoed Bishop — Defensive Only-Moves
- Trapping an Fianchettoed Bishop — Blitz Pattern Reflex
- Trapping an Fianchettoed Bishop — Coached Mode Drill
- Trapping an Fianchettoed Bishop — Engine Sparring
- Trapping an Fianchettoed Bishop — Coordinate Chunking
- Trapping an Fianchettoed Bishop — Mistake Retry Loop
- Trapping a Greedy b2/b7 Poisoned-Pawn Queen — CCT Scan Protocol
- Trapping a Greedy b2/b7 Poisoned-Pawn Queen — Blunder Prevention
- Trapping a Greedy b2/b7 Poisoned-Pawn Queen — Visualization Tree
- Trapping a Greedy b2/b7 Poisoned-Pawn Queen — Move-Order Inversion
- Trapping a Greedy b2/b7 Poisoned-Pawn Queen — Defensive Only-Moves
- Trapping a Greedy b2/b7 Poisoned-Pawn Queen — Blitz Pattern Reflex
- Trapping a Greedy b2/b7 Poisoned-Pawn Queen — Coached Mode Drill
- Trapping a Greedy b2/b7 Poisoned-Pawn Queen — Engine Sparring
- Trapping a Greedy b2/b7 Poisoned-Pawn Queen — Coordinate Chunking
- Trapping a Greedy b2/b7 Poisoned-Pawn Queen — Mistake Retry Loop
- En Passant Discovered Check — CCT Scan Protocol
- En Passant Discovered Check — Blunder Prevention
- En Passant Discovered Check — Visualization Tree
- En Passant Discovered Check — Move-Order Inversion
- En Passant Discovered Check — Defensive Only-Moves
- En Passant Discovered Check — Blitz Pattern Reflex
- En Passant Discovered Check — Coached Mode Drill
- En Passant Discovered Check — Engine Sparring
- En Passant Discovered Check — Coordinate Chunking
- En Passant Discovered Check — Mistake Retry Loop
- Castling with Check (0-0+ / 0-0-0+) — CCT Scan Protocol
- Castling with Check (0-0+ / 0-0-0+) — Blunder Prevention
- Castling with Check (0-0+ / 0-0-0+) — Visualization Tree
- Castling with Check (0-0+ / 0-0-0+) — Move-Order Inversion
- Castling with Check (0-0+ / 0-0-0+) — Defensive Only-Moves
- Castling with Check (0-0+ / 0-0-0+) — Blitz Pattern Reflex
- Castling with Check (0-0+ / 0-0-0+) — Coached Mode Drill
- Castling with Check (0-0+ / 0-0-0+) — Engine Sparring
- Castling with Check (0-0+ / 0-0-0+) — Coordinate Chunking
- Castling with Check (0-0+ / 0-0-0+) — Mistake Retry Loop
- Opposition Breakthrough (3 vs 3 Pawns) — CCT Scan Protocol
- Opposition Breakthrough (3 vs 3 Pawns) — Blunder Prevention
- Opposition Breakthrough (3 vs 3 Pawns) — Visualization Tree
- Opposition Breakthrough (3 vs 3 Pawns) — Move-Order Inversion
- Opposition Breakthrough (3 vs 3 Pawns) — Defensive Only-Moves
- Opposition Breakthrough (3 vs 3 Pawns) — Blitz Pattern Reflex
- Opposition Breakthrough (3 vs 3 Pawns) — Coached Mode Drill
- Opposition Breakthrough (3 vs 3 Pawns) — Engine Sparring
- Opposition Breakthrough (3 vs 3 Pawns) — Coordinate Chunking
- Opposition Breakthrough (3 vs 3 Pawns) — Mistake Retry Loop
- Outpost Knight vs Bad Bishop Domination — CCT Scan Protocol
- Outpost Knight vs Bad Bishop Domination — Blunder Prevention
- Outpost Knight vs Bad Bishop Domination — Visualization Tree
- Outpost Knight vs Bad Bishop Domination — Move-Order Inversion
- Outpost Knight vs Bad Bishop Domination — Defensive Only-Moves
- Outpost Knight vs Bad Bishop Domination — Blitz Pattern Reflex
- Outpost Knight vs Bad Bishop Domination — Coached Mode Drill
- Outpost Knight vs Bad Bishop Domination — Engine Sparring
- Outpost Knight vs Bad Bishop Domination — Coordinate Chunking
- Outpost Knight vs Bad Bishop Domination — Mistake Retry Loop
- Exchange Sacrifice for Dark-Square Control — CCT Scan Protocol
- Exchange Sacrifice for Dark-Square Control — Blunder Prevention
- Exchange Sacrifice for Dark-Square Control — Visualization Tree
- Exchange Sacrifice for Dark-Square Control — Move-Order Inversion
- Exchange Sacrifice for Dark-Square Control — Defensive Only-Moves
- Exchange Sacrifice for Dark-Square Control — Blitz Pattern Reflex
- Exchange Sacrifice for Dark-Square Control — Coached Mode Drill
- Exchange Sacrifice for Dark-Square Control — Engine Sparring
- Exchange Sacrifice for Dark-Square Control — Coordinate Chunking
- Exchange Sacrifice for Dark-Square Control — Mistake Retry Loop
- Positional Queen Sacrifice for 3 Pieces — CCT Scan Protocol
- Positional Queen Sacrifice for 3 Pieces — Blunder Prevention
- Positional Queen Sacrifice for 3 Pieces — Visualization Tree
- Positional Queen Sacrifice for 3 Pieces — Move-Order Inversion
- Positional Queen Sacrifice for 3 Pieces — Defensive Only-Moves
- Positional Queen Sacrifice for 3 Pieces — Blitz Pattern Reflex
- Positional Queen Sacrifice for 3 Pieces — Coached Mode Drill
- Positional Queen Sacrifice for 3 Pieces — Engine Sparring
- Positional Queen Sacrifice for 3 Pieces — Coordinate Chunking
- Positional Queen Sacrifice for 3 Pieces — Mistake Retry Loop
- King Walk to Safety in Attack — CCT Scan Protocol
- King Walk to Safety in Attack — Blunder Prevention
- King Walk to Safety in Attack — Visualization Tree
- King Walk to Safety in Attack — Move-Order Inversion
- King Walk to Safety in Attack — Defensive Only-Moves
- King Walk to Safety in Attack — Blitz Pattern Reflex
- King Walk to Safety in Attack — Coached Mode Drill
- King Walk to Safety in Attack — Engine Sparring
- King Walk to Safety in Attack — Coordinate Chunking
- King Walk to Safety in Attack — Mistake Retry Loop
- Prophylactic King Move (Kh1/Kh8) — CCT Scan Protocol
- Prophylactic King Move (Kh1/Kh8) — Blunder Prevention
- Prophylactic King Move (Kh1/Kh8) — Visualization Tree
- Prophylactic King Move (Kh1/Kh8) — Move-Order Inversion
- Prophylactic King Move (Kh1/Kh8) — Defensive Only-Moves
- Prophylactic King Move (Kh1/Kh8) — Blitz Pattern Reflex
- Prophylactic King Move (Kh1/Kh8) — Coached Mode Drill
- Prophylactic King Move (Kh1/Kh8) — Engine Sparring
- Prophylactic King Move (Kh1/Kh8) — Coordinate Chunking
- Prophylactic King Move (Kh1/Kh8) — Mistake Retry Loop
- Counter-Sacrifice to Simplify Into Won Ending — CCT Scan Protocol
- Counter-Sacrifice to Simplify Into Won Ending — Blunder Prevention
- Counter-Sacrifice to Simplify Into Won Ending — Visualization Tree
- Counter-Sacrifice to Simplify Into Won Ending — Move-Order Inversion
- Counter-Sacrifice to Simplify Into Won Ending — Defensive Only-Moves
- Counter-Sacrifice to Simplify Into Won Ending — Blitz Pattern Reflex
- Counter-Sacrifice to Simplify Into Won Ending — Coached Mode Drill
- Counter-Sacrifice to Simplify Into Won Ending — Engine Sparring
- Counter-Sacrifice to Simplify Into Won Ending — Coordinate Chunking
- Counter-Sacrifice to Simplify Into Won Ending — Mistake Retry Loop
- Hanging Pieces (Loose Piece Drop) — CCT Scan Protocol
- Hanging Pieces (Loose Piece Drop) — Blunder Prevention
- Hanging Pieces (Loose Piece Drop) — Visualization Tree
- Hanging Pieces (Loose Piece Drop) — Move-Order Inversion
- Hanging Pieces (Loose Piece Drop) — Defensive Only-Moves
- Hanging Pieces (Loose Piece Drop) — Blitz Pattern Reflex
- Hanging Pieces (Loose Piece Drop) — Coached Mode Drill
- Hanging Pieces (Loose Piece Drop) — Engine Sparring
- Hanging Pieces (Loose Piece Drop) — Coordinate Chunking
- Hanging Pieces (Loose Piece Drop) — Mistake Retry Loop
- Overworked Defender on Two Diagonals — CCT Scan Protocol
- Overworked Defender on Two Diagonals — Blunder Prevention
- Overworked Defender on Two Diagonals — Visualization Tree
- Overworked Defender on Two Diagonals — Move-Order Inversion
- Overworked Defender on Two Diagonals — Defensive Only-Moves
- Overworked Defender on Two Diagonals — Blitz Pattern Reflex
- Overworked Defender on Two Diagonals — Coached Mode Drill
- Overworked Defender on Two Diagonals — Engine Sparring
- Overworked Defender on Two Diagonals — Coordinate Chunking
- Overworked Defender on Two Diagonals — Mistake Retry Loop
- Trapped Rook in the Corner — CCT Scan Protocol
- Trapped Rook in the Corner — Blunder Prevention
- Trapped Rook in the Corner — Visualization Tree
- Trapped Rook in the Corner — Move-Order Inversion
- Trapped Rook in the Corner — Defensive Only-Moves
- Trapped Rook in the Corner — Blitz Pattern Reflex
- Trapped Rook in the Corner — Coached Mode Drill
- Trapped Rook in the Corner — Engine Sparring
- Trapped Rook in the Corner — Coordinate Chunking
- Trapped Rook in the Corner — Mistake Retry Loop
- Pin-Breaker Counter-Attack — CCT Scan Protocol
- Pin-Breaker Counter-Attack — Blunder Prevention
- Pin-Breaker Counter-Attack — Visualization Tree
- Pin-Breaker Counter-Attack — Move-Order Inversion
- Pin-Breaker Counter-Attack — Defensive Only-Moves
- Pin-Breaker Counter-Attack — Blitz Pattern Reflex
- Pin-Breaker Counter-Attack — Coached Mode Drill
- Pin-Breaker Counter-Attack — Engine Sparring
- Pin-Breaker Counter-Attack — Coordinate Chunking
- Pin-Breaker Counter-Attack — Mistake Retry Loop
- Double Threat (Mate + Loose Undefended Piece) — CCT Scan Protocol
- Double Threat (Mate + Loose Undefended Piece) — Blunder Prevention
- Double Threat (Mate + Loose Undefended Piece) — Visualization Tree
- Double Threat (Mate + Loose Undefended Piece) — Move-Order Inversion
- Double Threat (Mate + Loose Undefended Piece) — Defensive Only-Moves
- Double Threat (Mate + Loose Undefended Piece) — Blitz Pattern Reflex
- Double Threat (Mate + Loose Undefended Piece) — Coached Mode Drill
- Double Threat (Mate + Loose Undefended Piece) — Engine Sparring
- Double Threat (Mate + Loose Undefended Piece) — Coordinate Chunking
- Double Threat (Mate + Loose Undefended Piece) — Mistake Retry Loop
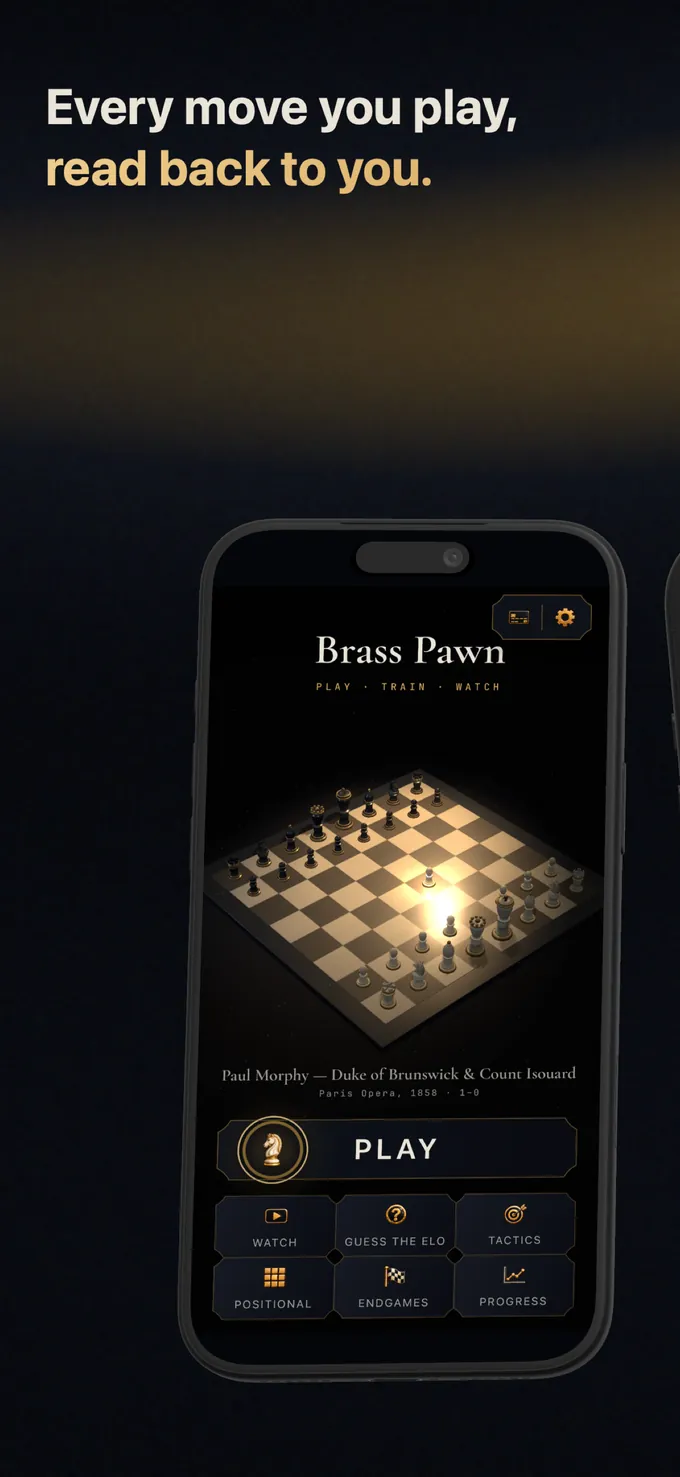
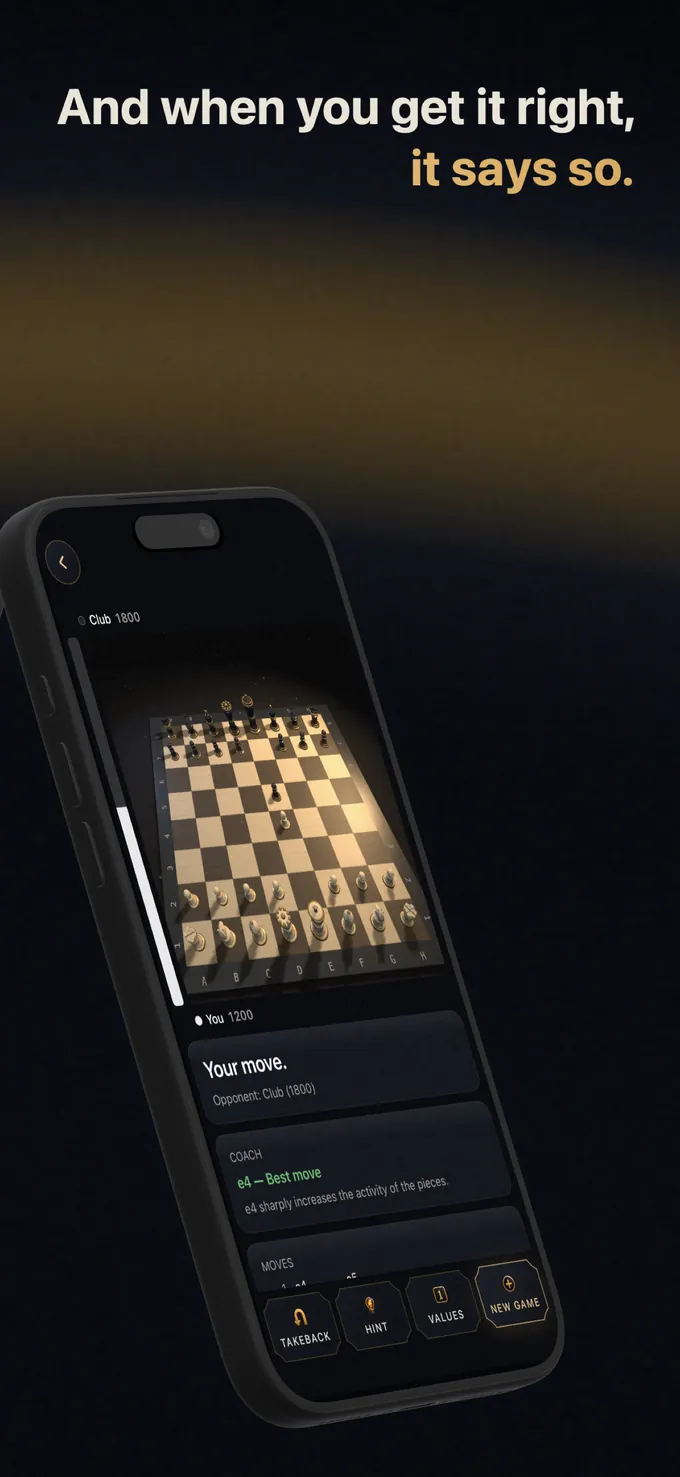
Brass Pawn Training Interface on iOS
Frequently Asked Questions
What is the fastest way to improve tactical vision?
Combine systematic motif recognition with candidate-move discipline (Checks, Captures, Threats) in Brass Pawn.